Thursday, June 23, 2011

Caramelized Onion Dip

Every year my family goes to the beach on vacation. 

Every year I make this dip.

Every year Katie and I eat it all.

Katie loves onions as much as I do.

I love Katie.

I love the beach.

I love this dip.

Even though I'm not at the beach this week, I made this dip.  I, um, needed to practice making it for vacation.  Just to be sure I remembered how to make it and all.

You'll need to heat some butter and olive oil in a big skillet.  We need a big skillet to caramelize the onions because onions start big and finish small.

I'll show you.

You'll need two big sweet onions.  Vidalias, of course.  Cut the ends off, chop them in half and slice 'em up.  Thin.

Cook the onions on medium heat for about 25-30 minutes.  Stir them frequently.  Cooking the onions slowly like this will allow all of the sugar to come out and will make them incredibly sweet and tender.  If you think you don't like onions, you've got to try this because this cooking process makes them taste very un-onion-y.

While the onions cook, get the rest of the ingredients ready.  Here's what we need:


Half of a block of cream cheese, and a heaping quarter cup each of mayo and sour cream.

When the onions have cooked for about a half hour, add some seasonings.  Salt, pepper and cayenne pepper.  The cayenne pepper gives the onions a nice pinkish color.

Look how much the onions shrunk!

Crazy.

While the onions are still hot, put them directly into a food processor.  Add the cream cheese, sour cream, and mayo. 


There's no reason to soften the creeam cheese.  The heat from the onions will do that for us.

Pulse it together until it's all combined and the onions are little pieces running throughout.


This makes almost exactly two cups of dip.  I know that because this is a 2-cup container. 

You can eat it immediately, which is how I like it.  It's still kind of warm from the onions and it's very creamy.  It's also great chilled in the refrigerator.  When it's cold, it firms up and becomes thicker.  Good both ways.

Serve with pretty much anything.  Cardboard, a spoon, it really doesn't matter.  This dip is that good.

But since I had some potato chips with ridges, I used those.  They were even reduced-fat chips.  Good thing, since I certainly didn't cut down on the fat in the dip.

Make this.  And pretend you're on vacation.

I think that's the second time I've said that this week.  I guess I can't wait to go on vacation!

Caramelized Onion Dip
Inspired by Barefoot Contessa

2 T butter
2 T olive oil
2 large sweet onions, cut in half and sliced thin
1/2 tsp salt
1/2 tsp pepper
1/4 tsp ground red (cayenne) pepper
Heaping 1/4 cup mayonnaise
Heaping 1/4 cup sour cream
4 oz. cream cheese

Heat the butter and olive oil in a large skillet over medium heat.  Add the sliced onions and cook, stirring frequently, for about 25-30 minutes, until the onions are very soft and have shrunk to about 1/4 the volume you started with.  When the onions are done, add the salt, pepper and cayenne pepper. 

Put the onions into the food processor bowl (fitted with the steel blade) and add the mayo, sour cream, and cream cheese.  Pulse until everything is combined.  Refrigerate until ready to serve.

Serve with chips, crackers and/or raw veggies.

Wednesday, June 22, 2011

Summer Veggie Saute

Another recipe inspired by the Bunny.  So you know it's gonna be good, because the Bunny only does good things.

My take on this recipe has zucchini, onion, corn, grape tomatoes and cheddar cheese.

Um, yum.

You can make a big pan of this for cheap, because you're either growing these vegetables in your garden (if you're cool like my dad) or you can get these on sale at the grocery store because they're in season and mounded to the ceiling.

So melt two tablespoons of butter in a skillet while you chop up the veggies.

And don't give me grief about the butter.  It's a saute, okay?  And a saute means you have to use butter.  Even if it means taking healthy vegetables and turning them into something less than healthy.  I don't make these rules.  But I do try to follow them.
And slice up an onion and toss it in.


And now cut the ends off of four small zucchini, slice them down the middle, and then across to make nice little semi-circles.  You want small zucchini because the big, overgrown ones are exactly that - big, overgrown, and tough.  So get little ones because they're cuter and yummier.


Toss the zucchini in.  Saute this on medium heat for about 5 minutes while you cut the corn off the cob.  By all means, use fresh corn.  Fresh corn is so delicious and so worth the hassle it is to cut it off the cob.


I used six ears because I happen to like corn.  A lot.

Toss the corn in and let the mixture go for another 5 minutes.  This is enough time for the zucchini to get soft, the onions to get soft and sweet, and the corn to cook just right and become tender.

Now take a container of grape tomatoes and slice most of them in half.  You can use the whole container if you love tomatoes.  But I used about 3/4 of the container and it was perfect for me.

Toss in the tomatoes and - you guessed it - cook it another 5 minutes.  This is the right amount of time for the tomatoes to became soft but not so long that they fall apart and you can't identify them as tomatoes.

Now that the veggies have cooked for a total of 15 minutes, turn the heat to low, sprinkle on some shredded cheddar cheese, and put a lid on the pot.  Five more minutes and the veggies will be cooked perfectly and the cheese will be melty and gooey. 

Just like that.

If you are lucky enough to have any of this left over, it's just as good the next night.  (And I don't say that lightly, because I generally don't think leftovers taste quite as good the second time around.)

This is delicious and summery.  Make it tonight.

Summer Veggie Saute
Inspired by Creating a Stir in the Bluegrass and Beyond

2 T butter
1 large sweet onion (like Vidalia), sliced
4 small zucchini, sliced in half lengthwise and cut cross-ways into thin semicircles
6 ears of corn, kernels cut from the cob
6 oz. grape tomatoes, sliced in half (this is about 3/4 of a standard 8 oz. package)
1 cup shredded sharp cheddar cheese
1/2 tsp salt
1/2 tsp pepper

Heat the butter over medium heat in a large saute pan.  When it is hot, add the onions and zucchini.  Cook for 5 minutes, stirring frequently.  Add the corn and cook another 5 minutes, stirring frequently.  Stir in the salt and pepper.  Add the grape tomatoes and cook another 5 minutes.  Sprinkle the cheese on top and turn the heat to low.  Cover the pan and cook another 5 minutes.

Serve immediately.

Monday, June 20, 2011

Stuffed Shells

There is nothing new or terribly innovative about this recipe. 

It is shell-shaped pasta stuffed with a ricotta cheese mixture and covered in sauce and more cheese. 

It's kind of old-fashioned.  But it is really good.

There are three basic parts to this: the sauce, the pasta, and the filling for the pasta.  They are easy steps.

Start with the sauce.

I went the easy road with the sauce and used a jarred marinara.  I'm in full pantry-and-freezer-clean-out-mode-before-we-move, so I took this opportunity to use a jar sitting in my pantry.

But even though I used a jar of sauce, I started out right: by sauteing an onion and some garlic in olive oil.

You could throw in ground beef and/or Italian sausage at this point and that would be delicious.  That's what I would do...if I were a normal person.

But since I'm in full clean-out-the-freezer mode, I tossed in a pound of frozen meatballs and cooked them in the sauce.  A little unorthodox to put meatballs on top of stuffed shells, but not a bad choice.

I added the sauce at the same time I added the meatballs.  You can ignore me right now if you want to use your favorite recipe for tomato sauce.  Here's mine:


Let the sauce simmer over low heat while you cook the pasta.

Put a big pot of water on to boil.  When it boils, add a bunch of salt and the jumbo shells.  A 12 oz package worked for me.  I had a few left over, but that was fine because some of them tore a little bit.  I'd rather have a few too many than run out, anyway.

While the shells cook and the sauce simmers, we can put together the filling.  I used a 15-oz container of ricotta cheese (it's about 2 cups) and two cups of cottage cheese.  If you're one of the people who shudders at the thought of cottage cheese, just use all ricotta cheese. 

But something possessed me at the grocery store and I bought the largest container of cottage cheese I've ever seen.  So now I'm trying to come up with ways to use it.  Besides eating it with a fork, I haven't come up with too many ways.  I'll be eating cottage cheese for the next month.

And crack three eggs and toss them in.  Add a tablespoon of Italian seasoning and a cup and a half of shredded parmesan cheese.

And stir it up!

I like the way the dried herbs look in the cheese mixture.  If you want to use fresh herbs, basil and thyme would be really good.

When the shells are done, drain them in a colander and let them cool for a minute.

Now go outside to see what is causing your 3-year-old to shriek.  Squish the microscopic spider that is causing the problem.

Return to your kitchen and spray a 9x13 baking dish with nonstick cooking spray.  Or you could be like me and use two 8x8 dishes so there's one to eat and one to freeze!

And then I remembered that the whole point of this dish was to clean out my freezer.

Darn.  Too late now.

Spoon a little of the sauce into the bottom of the dish.

Then start stuffing the shells!  Just lay them in the dish any old way.  It's all going to get covered with more sauce and cheese, so the appearance doesn't matter too much.
My shells are not perfect but I'm okay with that. 

Now cover them with sauce.  Lots of sauce.  And meatballs, if you're weird like me.

And then cover the sauce with cheese.  Lots of cheese.

Bake at 350 degrees for about 35 minutes or so.  We want it to be very bubbly and the cheese to be very melty.

I forgot to take a picture of the finished product.  But I think we all know what bubbly cheese looks like.

Hope you enjoy!

Stuffed Shells

12 oz. package jumbo shells pasta, cooked according to package directions and drained
1 T olive oil
1 onion, chopped
3 cloves garlic, minced
Large jar of marinara sauce (or two regular-sized jars)
1 lb ground beef
1/2 lb sweet Italian sausage
15 oz container of ricotta cheese
2 cups cottage cheese
3 eggs
1 1/2 cups parmesan cheese
1 T Italian seasoning
8 oz. package shredded Italian blend cheese

While the pasta cooks, heat the olive oil in a large skillet and saute the onion until soft, for about 8 minutes.  Add the garlic and cook another minute.  Add the ground beef and sausage and cook it until cooked through and crumbly.  Drain most of the grease from the pan.  Add the sauce and simmer on low while you make the cheese filling.

Put the ricotta cheese, cottage cheese, parmesan cheese, eggs, and Italian seasoning in a bowl and mix well.

Spray a 9x13 baking dish with cooking spray and ladel enough sauce into the dish to barely cover the bottom.

Drain the pasta in a colander and when it is cool enough to handle, begin to stuff the shells with the cheese mixture.  Each shell will hold about 2 tablespoons of cheese filling.  Place the stuffed shells in the dish.  You will probably have some shells left over.

Cover the shells with the sauce.  Top with the shredded Italian blend cheese.

Bake on 350 for about 30-35 minutes until it is hot and bubbly.

Friday, June 17, 2011

Meemaw's Red Velvet Cake

As you already know, I was a guest blogger on Bethany's Book Blog earlier this week.  Bethany has graciously agreed to share her family's Red Velvet Cake recipe with us!  I have to admit that I was one of the decieved - I thought that cream cheese icing was the proper way to top a RVC.  I am grateful to be properly informed now!  This looks wonderful, Bethany!  Thanks for sharing!

Well, this certainly is an honor!  My name is Bethany, and I am so excited to be Elizabeth’s very first guest blogger.  This is a historic moment for sure! 


Pull up a chair, and let me tell you a little bit about myself….. Elizabeth and I met our freshman year in college; we lived in the same dorm and on the same hall.  That was twelve years ago.  I can’t believe that I’m old enough to even say something like that!  Wow!!!  I guess I’m getting older, but I still feel the same……. except wiser – I am definitely wiser than I was twelve years ago.  Anyway, we were an instant match.  Somehow our two opinionated personalities never clashed, and we’ve only grown closer through the years.  We have kept in contact with many phone calls and several visits.  This year will mark our second half-marathon that we will be running together.  Isn’t that something?  I’ll give you a minute to oooh and aaah.  Ok, that’s enough.  We only run so we can eat all this food we cook.  Isn’t Elizabeth’s blog awesome?  I’m loving it.
I am married to my wonderful husband of 6 years.  Now I feel like I’m a contestant on a game show – they always refer to their spouse & children as wonderful.  Fortunately for me, this is no game show, and my hunky honey truly is wonderful.  This fall we will celebrate 6 years of wedded bliss.  Fortunately, God saw fit to place us far South of that dreaded Mason-Dixon line.  What a blessing!  I can’t wait until Elizabeth is back in the gracious, wonderful South – the place where friendships are sweeter, and people know what seersucker is.  I work full-time for an insurance agent, and in my spare time I’m voraciously reading to beat my hunky honey in our book reading competition.  I’ve created a blog to keep up with our success, and to review all the books that I’ve read.  Bethany’s Book Blog has been a lot of fun for me.  I love followers, so please check me out and leave a comment!  On to the recipe………..
Today I am going to divulge to you a secret family recipe (totally unlike those stupid Bush’s baked beans commercials).  This is much sweeter, and we haven’t made any money off this recipe.  Anyway, it is my Meemaw’s Red Velvet Cake recipe.  Growing up, my mom made this cake for my birthday every single year.  It was my very, very favorite growing up.  Let me start by bringing you into the light.  Traditional RVC is NOT – let me say that again N O T – frosted with cream cheese icing.  That is very near blasphemy.  Cream cheese icing, as delicious as it is, only belongs on fruit and vegetable cakes – like carrot cake & strawberry cake….. or cardboard because let’s face it, cream cheese icing is delicious!  However, traditional RVC is made with RVC frosting.  RVC frosting is a buttercream of sorts – although it’s not quite a true buttercream & can’t really be called buttercream frosting.  If you insist on frosting your RVC cake with cream cheese icing, then don’t call it RVC…… you’ll just have to call it a fake, an imposter, a wanna-be.  Now that you know this is a ditch in which I’m willing to die, let’s move on.
We are going to make a traditional cake recipe.  There is one kind of funky think about this recipe.  You will see that we will be mixing white vinegar and baking soda.  It will fizz and you will pour it into your cake batter.  This is an essential step that many recipes leave out.  Additionally, we will be adding vanilla and almond flavoring – again many recipes leave out the almond flavoring.  Don’t do that!  It makes such a wonderful tasting cake.
First, go ahead & gather up all your ingredients.  It’s great to have them handy so that you can get this delicious cake in the oven as soon as possible.
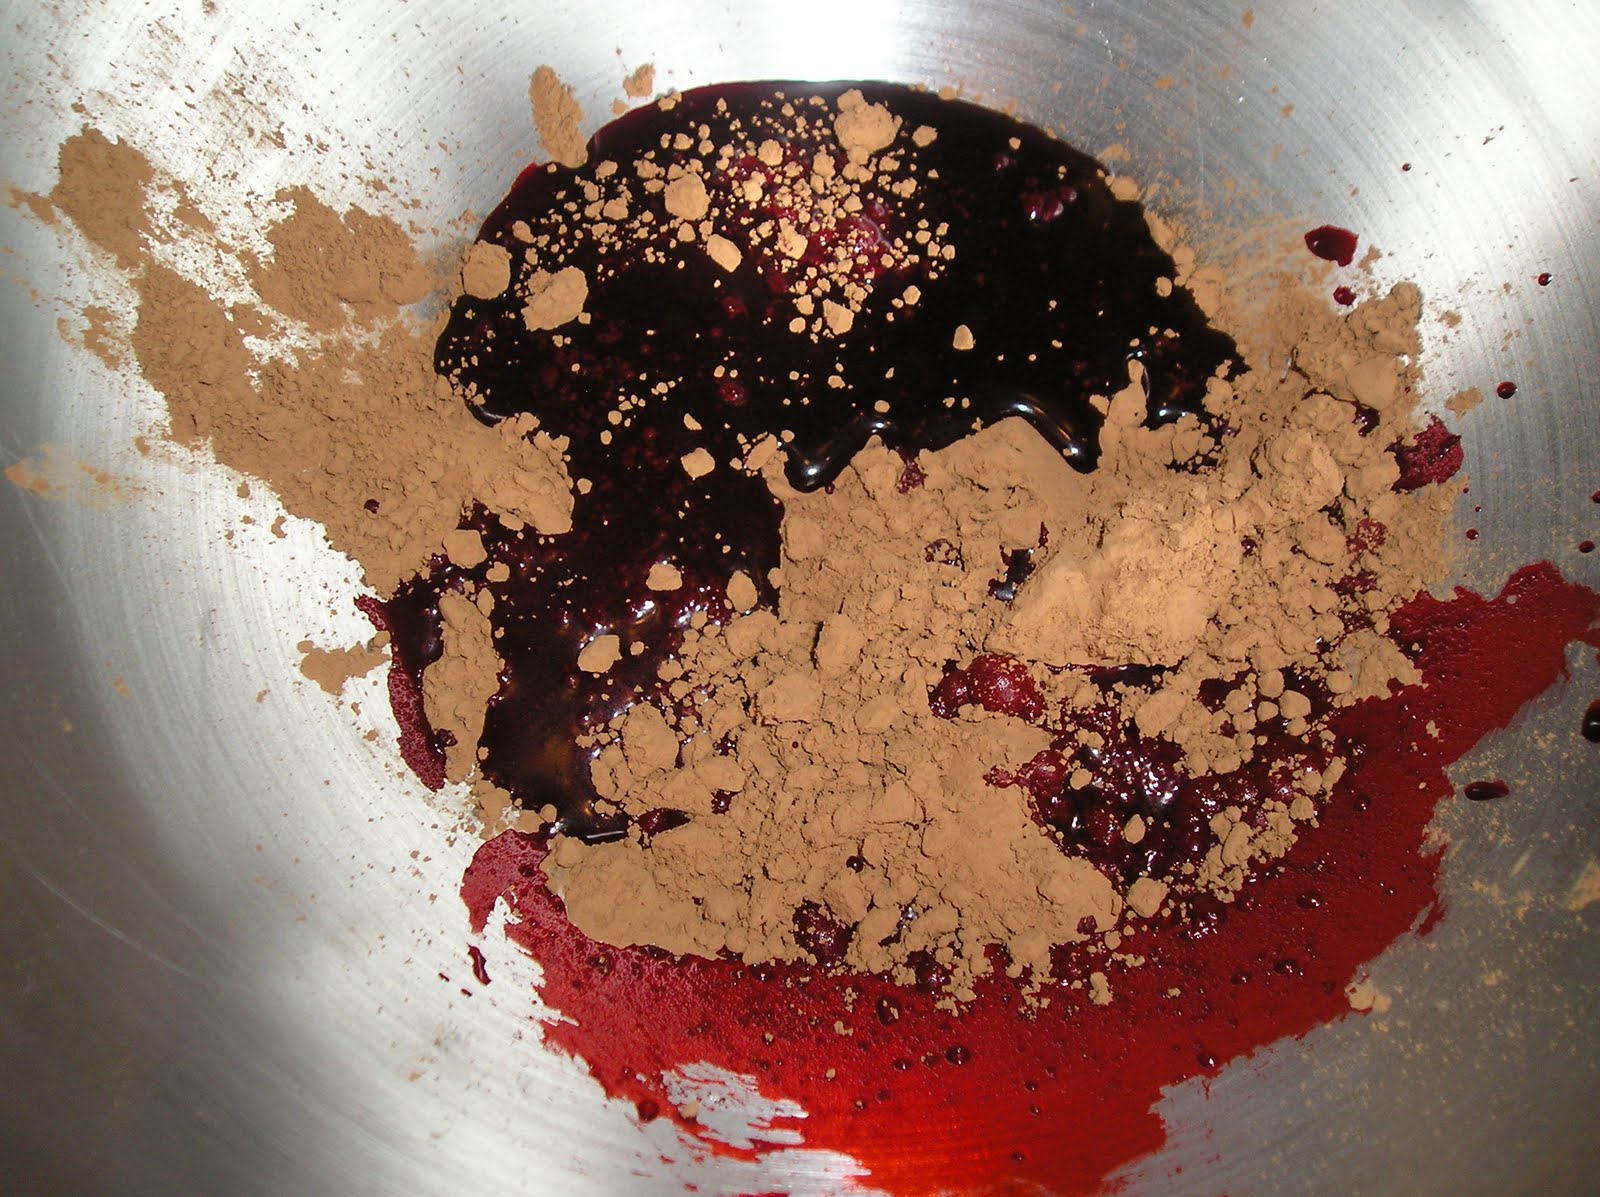
In the bowl of your mixer, begin by mixing together the cocoa and red food coloring.  If you are using a standing mixer and your paddle attachment doesn’t do the job, then you may need to get in there with a wire whisk.

Next you are going to add your shortening, sugar and eggs.  Mix well.  Your mixture should look something like this.  Are you beginning to get the reference to red velvet?
In a separate bowl, sift together the flour and salt.  Now, I know that Elizabeth likes kosher salt for all things, but I do not like it for baking.  I recommend regular Morton’s table salt…. but use whatever you prefer.


Now we are going to alternately add our sifted ingredients to the batter with buttermilk – beginning and ending with the dry ingredients.  Your finished product will very much resemble a red velvety cake batter. 


In a separate little bowl, combine your vanilla and almond flavorings.  Pour into the batter.  Do not mix yet.
In another little bowl, combine your vinegar and baking soda.  I recommend pouring the vinegar first and then stirring in the baking soda.  This will fizz on you.  This is what you want to happen.  Pour into the batter.  Now you can mix everything together.
You are now ready to pour this red velvety goodness into your two prepared cake pans.  To prep your pans, spray both pans with non-stick cooking spray.  Now cut out two rounds of parchment paper to fit in the bottom of each pan and put them in the bottom (the cooking spray will help the parchment paper to stick).  Now spray the pans again and sprinkle in some flour and slowly and gently tap the flour around the pan (sides included) until the pan is well coated with the flour.  Tap out any excess flour.  My prepared pans look like this….
Evenly divide the batter into the pans and bake until they are just done.  Don't over-bake them, by all means.  Once they come out, let them sit in the pan for about 2-3 minutes before removing them to wire racks to cool completely.
Are you ready to learn how to prepare RVC frosting?  Here we go!
First we will make a flour paste.  Cook your milk, flour, & salt in a saucepan over medium heat.  You must stir constantly while this flour paste is forming.  It won’t take very long.
Once your flour paste has formed, remove from heat completely.  You MUST let this cool to room temperature completely.  Cooling completely will probably take about 20-30 minutes.  You want this to be room temperature when you add it to your butter and sugar mixture.
Next, beat your butter and sugar in a mixer fitted with the whisk attachment for 7 minutes.  
I beat it on speed 6 of my Kitchenaid mixer.  Gradually add the cooled flour paste.  Not all at once.  Tablespoon by tablespoon works well.  Lastly, you will add your vanilla for one final mix.  Your yummy RVC frosting will look like so.  And this frosting is yummy!  Try not to let your husband feed all of it to your kitties!


Now you are ready to frost your cake.  Place one layer, rounded side down, on cake plate, spread about 1/2 cup of frosting to within 1/4 inch of the edge.  Place second layer, rounded side up, on frosted layer.  Frost second layer.  Frost the sides by globbing the frosting on the top and use your spatula or knife to drop the frosting down the sides.  


If you have a ridiculous cake decorating tool, then by all means do a ridiculous totally unprofessional little border like I’ve done.  Oh, and then decide whether to give the empty bowl of frosting to your husband or your cats.
You can serve immediately or the next day.  Your guests will love it!  Please invite me over when you make this!


Now, please forgive the tacky blue “plate” on which this cake is served.  This is the bottom to my cake carrier, & since I wasn’t serving this cake until the following day it was necessary to store it in my airtight cake carrier.  I know it’s tacky, but at least I don’t have pink flamingos in my front yard!
Thank you for joining me.  Let me know what you think.  I’d love to hear from you!


Meemaw’s Red Velvet Cake
2 – 1 oz. bottles red food coloring
3 T cocoa
½ cup shortening
1 ½ cups sugar
2 eggs
2 ¼ cups flour
½ tsp. salt
1 cup buttermilk
1 tsp. vanilla extract
1 tsp. almond extract
1 tsp. baking soda
1 T white vinegar


Red Velvet Cake Frosting
1 cup milk
3 Tbsp. flour
pinch of salt
1 cup butter, at room temperature
1 cup sugar
1 tsp vanilla extract


For the cake, mix cocoa & coloring in the bowl of your stand mixer.  Add shortening, sugar and eggs, mixing well with the paddle attachment.


Sift flour and salt together and add alternately to mix with buttermilk, beginning and ending with the flour mixture.  Add vanilla and almond extracts to batter but do not mix.  Stir soda into vinegar, add to batter and mix it all together.   
Prepare two round cake pans - spray the bottoms with nonstick cooking spray, line only the bottoms of the pans with circles cut from parchment paper, spray the whole pan with nonstick cooking spray and then dust it with flour, tapping out any excessive flour.  Pour batter evenly into cake pans.  Bake 20-25 minutes at 350.  Allow them to cool for 2-3 minutes in the pan before removing the cakes to wire racks.  Cool completely.


For the icing, cook milk, flour and salt in a saucepan over medium heat.  Stir constantly.  Once thickened, remove from heat and let cool completely.  Beat butter and sugar together for 7 minutes.  Gradually add the flour paste, beat until fluffy.  Stir in vanilla.
To frost the cake: place one layer, rounded side down, on cake plate, spread about 1/2 cup of frosting to within 1/4 inch of edge.  Place second layer, rounded side up, on frosted layer.  Frost second layer.  Depending on how much frosting you have left, you can frost the sides too.  The best way to do that is to kinda just glob the frosting up on the side of the cake.  Then take your metal frosting spatula, and smooth the frosting out by turning the cake plate around as you move your spatula until the cake is covered.

Thursday, June 16, 2011

Sausage-Green Chile Quiche

Brunch is my favorite meal.

It's the best of both worlds.

It's breakfast enough to eat things like omeletes, pancakes, hashbrown casserole, and fruit. 

Yet it's still lunch enough to finish it off with something like a chocolate tart.

Quiche is one of my favorite things to have for brunch.  Or breakfast.  Or lunch.  Or dinner, for that matter.

Quiche is sort of like an omelete with a crust.  Or a frittata in a pastry.  It's just delicious.

My husband used to subscribe to the belief that real men don't eat quiche.  Over the years, he has changed his opinion.

I mean, what man wouldn't like eggs, sausage, green chiles, and cheese in a flaky crust?  This quiche is basically a savory Mexican pie.  There's just nothing girlie about it.

So we'll start with the pie crust.  I use Pillsbury pie crust because it tastes like homemade.  Now, normally I have no problem with generic products, but this is one exception.  Definitely be sure to get Pillsbury. 

As an aside, Pillsbury comes with two individually-packaged pie crusts in each box.  If you only need one crust, freeze the other one just as packaged.  It will stay nice and fresh until you need it later.


The trick is to sit the crust on the counter until it comes to room temperature - a good half hour or so.  The result is flaky and delicious - everything a homemade pie crust should be.  Your friends will think you made your crust from scratch.

Normally I advocate honesty.  But in this situation, it's okay to just smile and say "thank you" when your friends say, "This crust is delicious!  You must have made it from scratch!"

Take a pie plate and spray it with cooking spray.  You'll need a deep-dish 9" pie plate for this.  That's just a normal pie plate - just make sure it's not a shallow one.  My mom says it's not necessary to spray because there is no way that the crust will stick.  But I cannot control my compulsion to spray every dish in which I bake.

To spray, or not to spray: that is the question.

Now lay the pie crust in and crimp the edges with your fingers.  My mom's crimped crusts always look better than mine.  Say "crimped crust" three times fast.


You won't need to stretch the crust to fit your dish and, as a matter of fact, please don't stretch the crust because it will shrink back to its original size while it bakes and that will do strange things to your quiche.

Now let's start on the filling.

Take a half pound of turkey sausage. 


And brown it up.  Crumble it well while you brown it.  We want little pieces of sausage, not hunks of sausage.


When it's brown and crumbled, take it off the heat and drain it on a paper towel-lined plate. 

Now back to the crust.  Take an 8-ounce package of finely shredded Mexican blend cheese and spread it evenly on top of the crust.

Just wike dis.  Bear with me.  Sometimes I lapse into Big-Sister-speak.  I'll come out of it soon.


Now sprinkle the turkey sausage on top.


Now we're going to cheese the sausage on top, too. 

We're making a nice resting place for the sausage.  It is encompassed on all sides by cheese.

Yum.

So for the top layer of cheese, we're going to use pepper jack cheese.  Get an 8-ounce block and shred it yourself.  You'll be glad you did.  Spread it evenly on top of the sausage.


In case you're counting, we're up to a full pound of cheese.

Now that I said that, no one is going to make this recipe, are they?  Maybe the faithful few will.  That's what I'm telling myself, anyway.

Now let's make the egg mixture to pour on top.  Here's what we need:


No, your eyes are not playing tricks on you.  We actually are going to pour half-and-half on top of a pound of cheese held by a flaky pastry. 

Told you men love this.  And now you know why.

Take a bowl and crack four eggs into it.  Pour in some half-and-half and two cans of green chiles.  Whisk it up.  Add some salt and pepper.


Now pour it on top of the quiche.


Bake it on 375 degrees.  This quiche is so dense and cheesy that it will need to bake for bake for about 50 minutes an hour.

It will come out puffed and golden and gorgeous.  You'll just have to imagine its gorgeousness because I forgot to photograph it.

Story of my life.

This is an awesome (and filling!) breakfast with some mini-muffins and fresh berries.  Or serve it for lunch with a nice green salad.  And if you have it for brunch, make a chocolate tart for dessert.

Sausage-Green Chile Quiche

1 refrigerated pie crust (from a package of 2)
1/2 pound turkey breakfast sausage, browned, crumbled and drained
8 oz. package finely-shredded Mexican blend cheese
8 oz. block of pepper jack cheese, shredded
4 eggs
2 4-oz cans chopped green chiles
1 cup half-and-half
3/4 tsp salt
1/2 tsp pepper

Allow the pie crust to come to room temperature (about 30 minutes on the counter).  Fit the pie crust in a 9-inch pie plate and crimp the edges.

In a bowl, beat together the eggs, green chiles, half-and-half, salt and pepper.
Spread the bag of Mexican blend cheese on top of the pie crust.  Sprinkle the cooked sausage on top of the cheese.  Spread the pepper jack cheese on top of the sausage.

Pour the egg mixture on top of the quiche.

Bake in a preheated 375 degree oven for 50 minutes to an hour.  When it is done, the top will be golden brown.  Stick a knife down in the middle to make sure the egg is cooked through.

Allow it to cool for about 10 minutes before slicing into wedges.