Tuesday, May 31, 2011

Baked Chicken Fettuccine

Okay, let's talk about this recipe. 

It is fabulous. 


Creamy, rich, cheesy...it's hard to improve on a pasta dish like this.

It is a version of a recipe from my friend Bethany.  We've been friends since college. 

We ran a mini-marathon together a few years ago.  We're going to run another one this year.

I run so that I can eat things like this Baked Chicken Fettuccine.

This dish is worth the pain of running.


I ran 5 miles yesterday because I had this for dinner last night.  I ran another 5 miles this morning because I had this for dinner last night.

It was so worth it.

There are a few steps to putting this dish together.  But they're easy steps.  And the recipe makes 8-10 servings, so it's well worth the effort. 

We have to cook the chicken, saute the mushrooms, cook the pasta, and then toss all of that together with lots of cheese and - the reason for all of the running - half-and-half.  Oh, my.

Put a large pot of water on to boil.  When it boils, add a lot of salt - a couple of tablespoons - and the fettuccine.  Cook it according to package directions.

Also put a smaller pot of water on to boil.  When it boils, add the chicken breasts.  These should take about the same amount of time as the pasta.  But just cook the chicken until it's cooked all the way through.  But don't cook it so long that it's tough.
Now heat a half of a stick of butter in a large skillet.  Take some mushrooms, wipe them with a damp paper towel, and slice them up.


Toss them into the butter and saute them on medium-high for about 8 minutes or so.  When they look like this,

turn off the heat and stir in a block of cream cheese.  Stir it all around until it gets melty and creamy and combines with the mushrooms.

Add in the salt and garlic powder and stir it again.

Now our chicken should be done.  Drain it and have your husband cut it into little pieces.

Once the fettuccine is done, drain it in a colander and return it to the pot.  Dump in the mushroom/cream cheese mixture.  Add the cut-up chicken.  Also dump in a can of cream of mushroom soup.
Now it's time to cheese it.  And half-and-half it.

We are going to use a half cup of shredded parmesan cheese.  And a whole cup of shredded Swiss cheese.  The Swiss cheese adds a wonderful flavor.  I love Swiss cheese.  It is probably my favorite kind of cheese, next to its sister, Gruyere, which is so special (read: insanely expensive) that I only have it once a year - when I get it in my Christmas stocking.  And then I am so excited to have Gruyere, I treat it like royalty.  I have a hard time deciding even how to use it because I know it will be gone once I use it.

I know: I need to get a bigger problem, right?
Enough about Gruyere, which this recipe doesn't even call for.  We also need an 8-oz package of shredded Italian cheese blend.  I like using this because it has all kinds of cheeses - hence the name blend - like mozzarella, provolone, romano, and a few other types I can't remember right now.  It is very melty and stringy and I love melty, stringy cheese.  I love melty cheese.  I love stringy cheese.  I. Love. Cheese.

Throw the cheeses in and pour in the half-and-half.  Two cups.  Don't give me grief about it.  Just do it.  And then go run 5 miles.

Stir it up.  Eat a few forkfuls of it before you pour it into the casserole dish. 

Okay, there are a couple of options here.  If you're feeding a small army, i.e., 8 people or so, then put it all in a 9x13 casserole dish. 

The other options, which is the route I took, is to divide it in half and use two 8x8 dishes.  One I put in the refrigerator for dinner on Monday night (I made it on Sunday) and other one I put in the freezer for a night I don't feel like cooking.  I let the refrigerated one sit on the counter for about an hour to knock the chill off before I put it in my hot oven.  I didn't really feel like picking up shards of my Pyrex dish because I put a cold dish into a hot oven.  I'm boring that way.

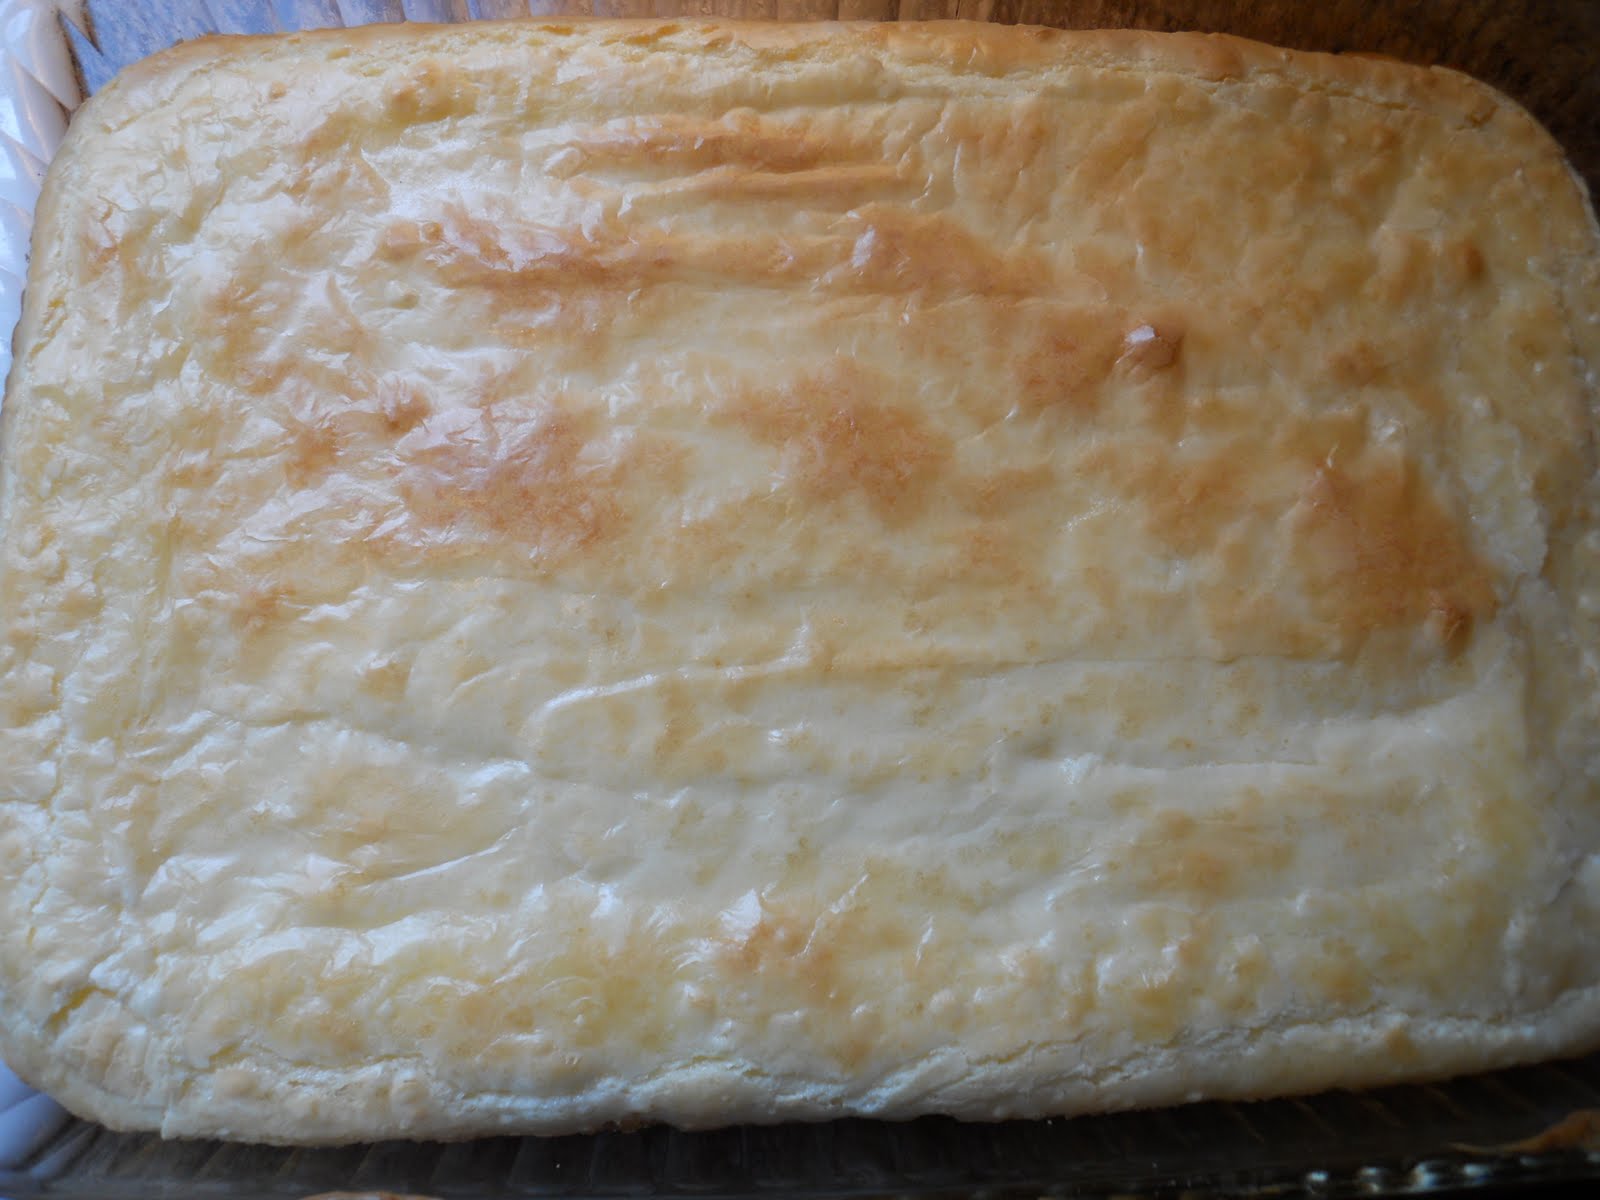
Once you're ready to bake it, cook it on 350 degrees for about 45 minutes or until it's hot and bubbly but not too brown.  It will be cheesy and creamy, full of chicken and pasta and mushrooms and have a subtle garlic flavor. 

It's ah-mazing.

Thank you, Bethany, for this recipe.  It is a winner.  Everyone I have ever taken it to or made it for has asked for the recipe. 

So here it is.

Now go run 5 miles.

Baked Chicken Fettuccine
8 oz. cavatappi pasta (or any short-cut pasta such as penne or gemelli), cooked according to package directions and drained
12 oz. mushrooms, cleaned and sliced
4 T (1/2 stick) butter
8 oz block cream cheese
1 10 oz. can cream of mushroom soup
1 1/2 tsp garlic powder
3/4 tsp salt
2 1/2 cups half-and-half (or whole milk)
4 chicken breasts, cooked and cubed (will yield about 4 cups)
1 cup (4 oz.) grated Swiss cheese
8 oz. package shredded Italian cheese blend
1/2 cup shredded parmesan cheese

Cook the pasta according to package directions and return it to the pot.

Heat the butter in a large skillet and add the mushrooms.  Saute for about 8 minutes until tender and starting to brown.  Turn off the heat and stir in the cream cheese.  Stir it in until it is creamy and soft and combined with the mushrooms.

Pour the mushroom/cream cheese mixture into the pasta pot and add the rest of the ingredients.  Stir well.

Pour the mixture into either a greased 9x13 dish or two 8x8 dishes.  Bake at 350 degrees for about 45 minutes until hot and bubbly.

This freezes well uncooked.  When you're ready to bake it, thaw it completely first and then bake as directed.

Monday, May 30, 2011

Greek Chicken


This cookbook is amazing.  One of my very favorites.  It is a Lexington original. 

My sister-in-law and I have a running conversation about this cookbook.  Neither of us can ever remember the actual title, so we just call it the "Bunny Cookbook."  Or just "the Bunny," for short.  You know, since it does have a bunny rabbit on the front of it and all.

Our conversations generally go something like this: "Last night I made this dish and it was so good!  You have to try it."  "Oh, where did you get the recipe?"  "The Bunny, of course."

You should invite the Bunny to come live at your house.  You'll be glad you did.

This Greek Chicken is inspired by a recipe from this cookbook.  It's just wonderful.  The book, that is.  And the Greek Chicken.

This Greek Chicken recipe is sauteed chicken breasts in a delicious, flavorful, garlic-oregano-and-sun-dried-tomato-feta-cheese-kalamata-olive-filled sauce.

You know how I am about sauce.

First we have to saute the chicken.  Heat a tablespoon of olive oil in a large skillet over medium-high heat.  Take four boneless, skinless chicken breasts and sprinkle salt and pepper on both sides. 

When the oil is hot, lay the chicken in the pan and brown it on the first side.  This should take 3 minutes or so.  Flip it over.  We don't need to worry about cooking the chicken through because I like my chicken medium-rare. 

Kidding.  We'll put the chicken back in the sauce where it belongs in a minute and cook it all the way through.

Once your chicken is nice and browned on both sides, remove it from the skillet with tongs and lay it on a plate.  Turn the burner down to medium and sprinkle in a tablespoon of flour.  Whisk it around to combine it with the olive oil remaining in the pan.  If you need to add another dash of olive oil to make a paste with the flour, then so be it.  Cook it together for about a minute or so.  You just made a roux!  The roux will make the sauce nice and thick.

Now add in two cloves of garlic that you minced up.  Cook it another minute.  Now we're ready for the chicken stock.  About a cup. 

Bring it to a boil and there you have it:

The flavorful, rich stock we used and the browned bits on the bottom of the pan from the chicken turned it this dark color.  I can see pieces of garlic swimming around in there, too.  The start to a very nice sauce. 

Return the chicken to the sauce and cover the skillet.  Reduce the heat to medium-low and cook it for about 10 minutes or until the chicken is cooked through.  See?  I really was joking about medium-rare chicken.

When the chicken is done, turn off the heat.

Okay, now we're ready to flavor the sauce.  We're going to use really delicious Greek flavors: lemon, sundried tomatoes, feta cheese, olives, and oregano.

Yum.

Squeeze in the juice of a whole lemon.  By all means, use an actual lemon and not juice out of a container in the freezer.  Thank you.  Slice up some sundried tomatoes and stir them in.  The dried, shriveled-up ones work well here because the sauce will reconstitute them, but the grocery moved them without telling me so I couldn't find them!  So I used the ones packed in oil which worked well too.  I took a picture of the neat ones that I bought but Blogger wouldn't let me load the picture for some reason so just imagine a jar of sundried tomatoes packed in oil.

In go the kalamata olives.  You can chop them up or leave them whole.  I had didn't feel like cleaning up olive parts and juice from my cutting board, so I just chunked them in whole.  I like the way they look when they're whole anyway.

Now the oregano.  Use dried oregano because fresh oregano is just a bit too overpowering.  I used this fancy oregano from the specialty food store:

Sometimes I like to pretend that Meijer is a specialty food store.

It's an issue I'm working through.

And now for the reason to make this dish:

Sprinkle a 4-oz container of crumbled feta over the top of the whole skillet of chicken and sauce.

Now we're ready to eat!

This is great served with couscous because it captures all of the wonderful sauce.  Or you can serve it with orzo, which is rice-shaped pasta, if you're not into couscous.  Or if your store moved couscous and didn't bother to tell you where they relocated it.  Or if you thought you had a box of couscous in your pantry and made this Green Chicken only to find out that you used your last box of couscous making a salad last week.

In any of those cases, use orzo.  It is a very good substitute.

Spoon some orzo (or couscous, if you're lucky) on your plate.  Place a chicken breast on top.  Then cover it up with the sauce, olives, sundried tomatoes, and feta.

Oh man is this good.

Greek Chicken
Adapted from Creating a Stir

1 T olive oil
4 boneless skinless chicken breasts
Salt and pepper for seasoning the chicken
1 T flour
2 cloves garlic, minced
1 cup chicken stock
Juice of 1 lemon
1/2 cup of sliced sundried tomato (either packed in oil or dried)
1/3 cup kalamata olives
1 tsp dried oregano
4 oz. crumbled feta cheese
10 oz. box of couscous, cooked according to package directions

Heat the olive oil in a large skillet over medium-high heat.  Season the chicken generously with salt and pepper on both sides.  Saute the chicken for about 6 minutes, turning halfway through, until the chicken is golden brown but not coked through.

Remove the chicken to a plate.  Sprinkle the flour into the skillet and whisk it around.  Cook it for about a minute.  Toss in the minced garlic.  Cook it about a minute.

Whisk in the chicken stock.  Bring it to a simmer and return the chicken to the skillet.  Cover, reduce the heat to medium-low, and simmer for about 10 minutes or until the chicken is just cooked through but still tender and juicy.

Turn off the heat and stir in the lemon juice, olives, sundried tomatoes, oregano.  Sprinkle the feta cheese over the top.

Serve with couscous to catch the sauce.

And make your mom happy and make something green to go with it.

Saturday, May 28, 2011

Ooey Gooey Butter Bars

Ooey Gooey Butter Bars.  Gooey Buttercake, if you're Pauler Deen.  I grew up calling it Chess Pie Squares.  This is my mom's recipe and it reminds me of my childhood.  My childhood doesn't seem like it was that long ago.  But I just turned 30, so I guess it was a long time ago.  Weird.

Anyway, whatever you want to call these yummy little squares is just fine.  It really won't matter what you call them at all, because you won't be able to stop eating them.

I've taken it to people when they had a baby.  I've taken it to Bible study many times.  (Aletta, this one's for you!)  I've taken it to friends' houses, to "pitch-ins" (for anyone south of the Mason-Dixon line, that's just a potluck), and pretty much any other excuse I could come up with to make this fabulous yet simple dessert.

If you're new to Ooey Gooey Butter Bars, it falls into the category of a bar cookie.  We'll make a crust and then top it with a cream cheese mixture and bake it all together.  Easy. 

The only way to mess this dessert up is to overcook it.  I find myself saying that a lot.  So, the truth is, when it comes to cooking and baking in general, don't overcook it.

There now.  Let's get going.

Take a box of yellow cake mix.  Betty knows best, so I buy Betty.  I stock up when they're $1/box at Kroger.  Have I mentioned how many ways you can use a box of cake mix and no one would ever know that you used a box of cake mix?

For the crust, we'll need a stick of butter and an egg to mix with the cake mix.


You can either use room-temperature butter or melted butter.  I've tried it both ways and it really makes no difference in the outcome.  Once again, this is a fool-proof recipe as long as you don't overbake it.

In a mixer with the paddle attachment, combine the cake mix, the egg, and the butter.

It's going to be stiff and very un-cake-like.  Rather, it will resemble a ball of stiff dough.  Like this:

Grease a 9x13 glass dish and put the crust in.  Considering that there is an entire stick of butter in the crust, I doubt the crust would stick to anything even if you wanted it to.  But I have a compulsion when it comes to greasing dishes that I'm going to bake in, so I spray it with some baking spray first.  But it's probably entirely unnecessary to do so.  But if you have issues like me, go ahead and grease your dish.  I can't believe I just wrote an entire paragraph about greasing your baking dish.  Moving on.

Okay, pat out the stiff dough into the bottom of the nicely greased dish.  No need to be perfect here.  Just make sure the crust is roughly the same thickness throughout.  But again, it just doesn't matter that much.  Because the only way to mess up this recipe is to overbake it.

Third time's a charm.

Here it is all patted out:

Those indentations are from my fingers.  I also ate a couple pinches of the dough, okay?  I love cake mix.

Now, take the same mixing bowl that you made the crust in.  Don't clean it out.  A few crust crumbs won't hurt the topping at all.  Because, as we all know by now, the only way to mess up this recipe...

I'm not going to say it again.

Into your dirty, crusty mixing bowl, put a block of room-temperature cream cheese, a pound of powdered sugar, two eggs, and a teaspoon of vanilla.  In case you buy your powdered sugar in 2-lb bags like I do, a pound of powdered sugar is roughly 4 cups.  But in the event that you don't use powdered sugar like I do, just buy a 1-lb. box.  It's easier than measuring it out because I inevitably manage to sprinkle it on my dog's back, who stands underneath my feet whenever I cook.

Use the same paddle attachment you used for the crust and beat the topping together.  It will be smooth and creamy, provided you follow instructions well and used room-temperature cream cheese.

Pour it over the crust.  Just like this.


Put it in a 350 degree oven for about 30 minutes.  35 minutes, tops.  Tops.  When you take it out, it won't be set so don't expect it to be.  Jiggle it a little.  It should still jiggle.  If you cook it until it's set, you will know that you broke the cardinal rule of this recipe.  And that would be a crying shame.

Take out your not-set-and-still-jiggly Ooey Gooey Butter Bars and let it cool on the counter.

My list of "How to Use a Boxed Cake Mix" is about 3.5 miles long, and this is at the top. 

When it's cool, cut it into squares and serve it to your friends.  They will follow you anywhere and do anything for you.

Just be sure to serve it on plates you got as a wedding gift becasue it's just special that way.  And this dessert, even though it's incredibly simple, is so special.

Ooey Gooey Butter Bars

1 box yellow cake mix
3 eggs, divided
1 stick of butter, either melted or at room temperature
1 8-oz package cream cheese, at room temperature
1 lb (or 4 cups) powdered sugar
1 tsp vanilla

Preheat your oven to 350 degrees.  Spray a 9x13 glass dish with nonstick cooking spray. 

Using a mixer, combine the cake mix, one egg, and the butter.  It will be a thick, stiff dough.  Press it into the bottom of the baking dish.

In the same mixing bowl, mix together the cream cheese, two eggs, powdered sugar and vanilla until it is creamy.  Pour it on top of the crust.

Bake 30-35 minutes.  It will still be jiggly when you take it out of the oven.  Cool completely before cutting into squares and serving.

Friday, May 27, 2011

Pan-Seared Filet of Beef

Filet of beef is my favorite cut of steak. For that matter, it's probably my favorite meal.  Cooked right - which means medium-rare - it is smooth as butter, moist and delicious.

I cannot over-emphasize the importance of medium-rare for a steak - any cut of steak.  If you want your steak cooked all the way through until it's all gray inside, then by all means just have a hamburger

The only right way to have a steak is for it to be pink (or red) all the way through.  Here's what I mean:


There.  I feel better.

My husband and I celebrated our anniversary at home this year.  Babies change everything, don't they?  And I wouldn't change anything.  I wanted our dinner to be special.  And this steak is special.  So it was the perfect choice.

Start with nice filets.  We got ours at Sam's because the price is right.  And the quality is great.


Raw chicken = yuck.  Raw beef = yum.  Weird, I know.  But I love beef. 

Let the meat sit at room temperature for about 15 minutes.  We want to knock the chill off of it before we lay it in a screaming hot pan.

Generously salt and pepper - coarsely ground - both sides.  And I mean generous.  I used about 1/4 teaspoon of each salt and pepper for each side of each steak.  The steaks are thick and it takes that much seasoning to give them the right flavor.  Be sure to press the salt and pepper into the steak so that it sticks.  Packing on the seasoning will create a delicious crust on our steak.


Melt a tablespoon each of olive oil and butter in a non-stick skillet.  The combo gives us the high burning temperature of olive oil and the unmistakable flavor of butter.


Heat the skillet on medium-high until it's really, really hot.  You want the steaks to sizzle when you lay them in the pan.  The hot pan will sear the meat, keep the juices inside where they belong, and form a nice crust with all of that seasoning we patted on the outside.

Cook the filets on the first side for exactly four minutes. 

Using tongs, turn them over and cook another three minutes.  Never pierce your meat with a fork or knife.  All the juice will run out and leave you with a dry filet. 

Be sure to set your timer so you don't let them go one degree past medium-rare.

When they're done, remove the skillet from the heat and top each steak with a pat of butter.  Just a teaspoon or so.  It's the perfect finish.


Now - this last part is really important.  Let the meat rest for 10-15 minutes before cutting it.  This gives the butter a chance to melt all over the meat.  It also keeps the juices inside and ensures that the last bite is just as juicy and delicious as the first.

And here's what it will look like inside:

Perfection.

Oh my word it was delicious.

Trust me.

Pan-Seared Filet of Beef

2 8-oz. filet mignon
1 tsp salt
1 tsp coarse-ground black pepper
1 T olive oil
1 T plus 2 tsp butter, divided

Allow the steaks to sit at room temperature for about 15 minutes.  Season generously each side with salt and pepper, rubbing the seasoning into the meat to ensure it sticks.  Heat the butter and olive oil in a non-stick skillet over medium-high heat for several minutes until it is very hot.  Place the steaks in the skillet.  They should sizzle when they hit the fat.  Cook for exactly 4 minutes.  Turn and cook another 3 minutes.  Remove from heat and lay a teaspoon of butter on each filet.  Let the meat sit for 10 minutes before serving.

Thursday, May 26, 2011

Wedge Salad

After my law school graduation, my family went to Harry & Izzy's for dinner.  It was fun to be with family and to celebrate the end of an era.  The food was fabulous too, of course. 

And my children both sat in their highchairs.  Through dinner.  For the first time in their lives. 

Predictably, the one time we have a private room is the one time they choose to behave in a restaurant.

It truly was a blessed evening.

And I had this salad.

It reminded me how much I love wedge salads. 

So I attempted to copy it the other night at home.  It ended up being pretty tasty.

At least my husband told me it was.

I'll tell you how I made it so you can pretend you're at Harry & Izzy's, too.

Take a head of iceberg lettuce and cut it into fourths.  You know, the kind that costs less than a dollar and has zero nutritional value.  Then cut out the core - it's easier to remove once you've quartered the lettuce.  Place each quarter on a salad plate, cut side up.  That way, the dressing will run all down through the lettuce where it's been cut open.  We want this because, as you remember, the dressing is the sole reason for eating salad.

Now top the wedge with blue cheese dressing.  It would be a crime to use any other type of dressing.  It would be awesome to make your own here, but I didn't.  Someday I will share my dad's recipe for blue cheese dressing because it is the best I've ever eaten.  Here's what I used since I didn't make my own:

It's in the refrigerated section and it's really very good.

Okay, since the dressing is simply not enough blue cheese, now we're ready for the blue cheese crumbles. 

Now slice some grape tomatoes in half and lay them on the plate on the sides of the lettuce wedge. 

Your salad will look about like this:


And here is a side view.  See the dressing getting between the lettuce leaves?  That's how it should be.

Lastly, coarse ground black pepper is critically important for a wedge salad.  Black pepper is the perfect heat to balance the crisp lettuce, the juicy, sweet tomatoes and the tangy, creamy blue cheese dressing.  Plus, the black pepper looks neat against the white dressing.  So don't leave it off.

Make this soon. 

Wedge Salad

1 head iceberg lettuce, quartered and cored
1 pint grape tomatoes, cut in half
4 oz. blue cheese crumbles
Blue cheese dressing
Coarse-ground black pepper

Place each lettuce quarter on a salad plate.  Drizzle with the blue cheese dressing.  Sprinkle the blue cheese crumbles over the top.  Lay the tomato halves on the plate around the wedge. Sprinkle black pepper on top to taste.

Makes 4 wedge salads.

Tuesday, May 24, 2011

Housekeeping

A few notes for you.

You can sign up to read Pithy's Kitchen by email.  Just look on the right side of the home page, scroll down a little bit, and enter your email address under the "Follow by Email."  After you enter your email address, you will then be prompted to confirm that you are not spam.  Once you do that, Blogger will send you an email and you will need to click on the link to once again confirm that you are not spam.

Apparently spam is a problem.

Also, right under the "Follow by Email," there is an option to "Follow with Google Friend Connect."  Your picture and Google profile (provided you have a Google profile) will appear in a little box with my other followers.

I have no idea what the difference is between "Follow by Email" and "Follow with Google Friend Connect."  Does anyone want to enlighten me?

Lastly, comments.  I like comments.  I don't get comments.  I know someone is checking my blog because I look at my stats.  I'm not ashamed to ask for feedback.  Please, people.  Don't leave me hanging here.  If you think something looks gross, don't hold back.  Leave a comment and tell me so.  And I will block you from my blog.  Just kidding!!!  Sort of.  If you think a recipe looks good, be bold and tell me so.  If you tried a recipe, by all means leave a comment.  Very few things make me happier than knowing that someone has made a recipe that I love. 

A note related to comments: if you have a request for a recipe, you can leave a comment about that too.  Aletta, Ooey Gooey Buttercake and Banana Pudding are coming soon! 

Okay, I think that's it for now.  We're having Wedge Salad tomorrow!  Yum!

Happy cooking, ya'll!

Best Chocolate Chip Cookies

Updated: I have been working on this recipe.  (Some people spend their time finding the cure for cancer; I am hard at work creating the perfect chocolate chip cookie.  Go figure.)  So I added a bit more salt (it doesn't make the cookies salty; just more flavorful).  And I refrigerated the dough - cold dough doesn't spread as much and keeps the cookies thicker while staying tender, moist and gives them a bakery look.  Try the new and improved version and let me know what you think!


This chocolate chip cookie breaks the rules. All the rules. It is ridiculously delicious. It is tender, gooey and chocolate-y. It is bigger than it should be. And you will love it.

It is my take of a Southern Living recipe. We all know that Southern Living knows best. If you didn't already know that, allow me to tell you: Southern Living knows best. Subscribe today. No, they didn't tell me to say that.


Start with cold butter. You heard me. Cold butter. I told you this recipe breaks all the rules, and the cardinal rule of baking is to use room-temperature ingredients. If you have the urge to use room-temperature butter, use another recipe.  Because for these cookies, we want our butter cold.


Okay, put your cold butter in your KitchenAid mixer. If you do not have a KitchenAid, your life is not complete.

Add 3/4 cup of white sugar and 3/4 cup of dark brown sugar to your cold butter. If you do not have dark brown sugar, wake your children from their naps, put them in their carseats, drive to the grocery and purchase dark brown sugar.

Then lock your mixer. If you don't believe me, leave it unlocked and you'll be cleaning clods of butter off your walls, floor and countertops for a long time. Now beat it until it is one homogenous mixture. See? I told you that cold butter is a must. And look at the color: this is why you want dark brown sugar.


Add the eggs, one at a time and mix well.  The eggs make it nice and creamy like this:
At this point, before adding the flour, you cannot over-mix the dough.  Not until we add the flour is over-mixing the dough a concern.  As soon as we add flour, over-mixing becomes a very real concern.  That is, if you're ever concerned about cookie dough. And I am. 

Add the vanilla. Make sure it is the real deal. Never, ever use imitation vanilla extract.  I know my vanilla picture is blurry.  And that is a shame.  But the important thing is that it's the real stuff.


Side story about vanilla: my husband and I were shopping at Sam's. As I was placing this super-sized bottle of Real Vanilla Extract into our cart, I made him promise that if something happened to me, he would never, ever buy the imitation stuff. I needed to be sure that he would pass on my vanilla values to our children. He looked between our two babies in the cart and then looked at me like my mind had just vacated the premises.

Of course. But at the moment, it was just something I needed to say. And I felt better after saying it.

Back to the baking at hand.  Once you add the wonderful flavor of vanilla, you want to add the dry ingredients.

Don't sift the flour. Don't dirty up another bowl by combining the flour, salt and baking power and then adding it slowly to the wet ingredients. I told you this recipe breaks all the baking rules. So just do it the way I say to do it. And you won't be sorry.

While the mixer is off, add the salt and of baking soda. Add the flour - all at once. Two cups, one-fourth cup, and two tablespoons of flour.  I realize it is a random amount of flour. Don't mess with it. Just do it.

Now you're ready to pulse. You can do squats while you pulse the mixer if that makes you feel better about the gooeyness you are about to enjoy.

We just entered the point of don't overmix the dough. It will develop the gluten in the flour. Now, I don't know what that actually means, but it sounds bad, doesn't it?  Basically, over-mixing will make your cookie taste like cake instead of a cookie.  If you want cake, make cake.  Just don't make your cookies into cake.

Pulse the mixer until the ingredients are almost combined. Then turn off your mixer and add the chocolate chips. I like a mix of semi-sweet and milk chocolate chips: the perfect combo of sweet and not-too-sweet.  Pulse again until the chips are almost incorporated, and then finish the job with a spatula by hand.  Remember, we don't want to over-mix the dough.  Scrape the bottom of the bowl well, because mixers never reach those spots.

Dear Mom: This is what the paddle attachment looks like.  Please do not use the whisk attachment to make these cookies.  Love, Lizzie.

Once the chocolate chips are combined, stick the whole mixing bowl into the refrigerator.  Chill the dough for at least 30-45 minutes.  If you want to skip this step, the cookies will taste the same but will be a little flatter than the chilled ones.

Use an ice cream scoop to portion the cookies.  Now you have two options.  You can either bake these immediately.  Or you can store the dough balls in the freezer.  Then, you can just bake them as you need them.  Is the word "need" appropriate to use when discussing chocolate chip cookies?  I think it is.  When you're ready to bake the frozen ones, just take them straight from the freezer to the oven - no thawing needed.

I froze some.  And I baked some.  It is best to use a baking sheet that has air bubbles in the sheet so your cookies don't get too brown. Bake them at 350 for about 13-15 minutes (obviously reduce your baking time if your cookies are not monsters like mine).


Pour yourself a glass of whole milk that you bought for your toddlers. Eat your warm cookie with a fork.


Tell me that doesn't break the rules.

Best Chocolate Chip Cookies
Adapted from Southern Living

1 1/2 sticks cold butter
3/4 cup sugar
3/4 cup dark brown sugar, packed
1 1/2 tsp vanilla
2 large eggs
1 tsp salt
1 tsp baking soda
2 1/4 cup plus 2 tablespoons flour
1 1/2 cups semi-sweet chocolate chips
1 1/2 cups milk chocolate chips

In a mixer, use the paddle attachment to beat the butter with both sugars until it is completely combined. Add the vanilla and both eggs and beat until combined.

Add the salt, baking soda and flour and pulse until almost combined. Scrape down the mixer. Add all of the chocolate chips and pulse again until almost combined. Finish incorporating the chips with a spatula, and make sure you scrape the bottom of the mixing bowl well.  At this point, you want to refrigerate the dough for 2-3 hours.  You can either scoop it onto a parchment paper-lined baking sheet and then refrigerate...or you can refrigerate the bowl of dough and then scoop it out when it's cold.  (I find that the dough is harder to scoop when it's cold.)

Bake at 350 degrees on a baking sheet lined with parchment paper (makes for easy removal) for 8-12 minutes, depending on the size of your cookie. The cookies will look a little underdone when you take them out but will set up as they cool.

Monday, May 23, 2011

Chicken with Cilantro Pesto

I'm still here.  Are you still here?  My world did not end on Saturday.  Did yours? 

No? 

Well, then.  Since we're all still here, we might as well enjoy one of God's blessings: cilantro.

This is one of my favorite ways to eat the south-of-the-border flavor.  Hope you like it too!  This is a great weeknight meal because it is so fast.

A few years ago I found a recipe for Cilantro Pesto in the Southern Living Annual Cookbook.  I knew I had to give it a try. The original recipe used shrimp, which was also delicious but, let's face it, not as cheap as the chipper chicken.

It's really yummy, fresh, light and easy. A great summer dish. A new way to spice up chicken.

You'll want to serve the pesto on top of chicken on top of a bed of rice. Asparagus and pineapple are great sides for this meal, by the way. I think that comes from my mom's insistence that we eat a fruit and a vegetable at meals.  Every meal.  Every single meal.  Now that I am a mom, I totally understand and yes, I make my children do the same thing.

You can marinate the chicken in lime juice and garlic if you want. If you don't want, just toss some boneless skinless chicken breasts on the grill with some olive oil and grill seasoning.

Start some water and rice in a pot. Not minute rice. The real stuff. I've already shown you my year's supply of Uncle Ben's long grain white rice from Sam's so I'll spare you that again.

And now we can make the pesto. This happens fast.

Take a bunch of cilantro and tear it roughly in half so that you end up with mostly leaves and a little bit of the stem. The stems will get ground up and won't be tough in the pesto. Make sure you wash your cilantro well - I forgot to wash mine one time and the pesto was sandy.  We gritted our way through dinner.  Nice.  My husband is such a good sport. So learn from my mistake and wash the leafy stuff.

Put the cilantro into your food processor.

Add in some green onions and a couple garlic cloves. As you can see, I used three cloves.  I have a garlic issue.  But we already knew that.  Then you want to bring the heat - throw in a serrano pepper. But lop the top off, cut it in half and clean out the seeds and ribs first. Otherwise you'll be breathing fire after your first bite. I left a few seeds in because I live on the edge.

Toss in a small tomato, the juice of a whole lemon, some olive oil, parm cheese and pine nuts.


But you'll want to toast the pine nuts first.

Just don't burn them. They cost more than gold bullion.  I've made that mistake before, too, and throwing away black pine nuts is just painful.  So don't do it.

Salt and pepper and whir it all up! Take off the lid of your food processor and smell the pesto. Mmmmm.


And that's it.

A dollop on top of grilled chicken and rice is summer on a plate. And be sure to eat your fruit and veggies. 


Cilantro Pesto
Adapted from Southern Living

1 bunch cilantro leaves (about a cup)
3 green onions, hairy ends removed and cut into thirds
1 jalapeno or serrano pepper, cut in half with the seeds and veins removed
1 small tomato
2 cloves garlic, peeled
Juice of a lemon
2 T olive oil
1/3 cup parmesan cheese
1/3 cup pine nuts, toasted
1 tsp salt
1/2 tsp pepper

Process all ingredients in the food processor until ground fine and mixed well.

Serve a dollop on top of a grilled chicken breast with rice.  Roasted asparagus and fresh pineapple go well with this meal.

The pesto will serve 3-4 people, depending on how much of it you like on top of your chicken.

Saturday, May 21, 2011

Chicken, Broccoli and Cheese Pockets

When I was in high school, I ate Hot Pockets all the time for lunch. I thought they were good. When I graduated from college and got a job as a paralegal, I switched to Lean Pockets. But I still ate them nearly every day.

And then I grew up, went to law school and had children of my own. And I haven't eaten Hot Pockets in years.

But I had a sudden craving the other day for a Hot Pocket. Random, I know.  And I thought, how hard can it be to make something like that? I had this can of seamless crescent roll sheets in my fridge because I saw it at the grocery and thought they looked neat. I had thought that I would make some sort of dessert with them, but I just never got around to it.

The pockets were a huge hit with my husband and my kids. And believe it or not, they homemade ones taste a little better than the frozen version.

This could not be simpler.

Steam a 10 oz. box of frozen chopped broccoli according to the directions on the package. You'll only need half of it, so the other half of it can be your kids' dinner vegetable.

Boil a chicken breast until cooked through. Chop it up.

Grate some cheddar cheese. About a cup.
Measure 1/4 cup of mayo and some salt, pepper and garlic powder. The garlic powder is a must.

Unroll the dough. If you get the seamless sheets, you don't have to pinch together the annoying perforated lines of normal crescent rolls. Life is too short to be annoyed by crescent roll dough.

Cut it into four (relatively) equal portions like this.

Take the chopped chicken, the chopped broccoli you cooked, the cheddar cheese and the mayo to hold it all together and combine it all to make the filling. Season it with the salt, pepper and garlic powder. Don't leave out the garlic powder. It adds a lot of flavor. Have I already said that once?  Oh.  Have I mentioned that I love garlic?

Okay, now your mixture will look like this:


Divide the filling equally among the four pieces of dough. Fold the dough over the filling and squeeze the sides together to make a pocket like this:


They sort of look like empanadas.

I used parchment paper on my baking sheet to ensure no stickage occurred.  Bake until nice and golden brown like this:


They will be gooey, cheesy and delicious inside like this:

Do you like my flower power plate?  I got these plates as a wedding gift.  My wedding was eight years ago
this week.  Wow, time flies.

Yum! Make you some homemade hot pockets soon!!  And serve them on a plate you got for your wedding.  They taste better that way. 

Chicken, Broccoli & Cheese Pockets
1 8 oz. package seamless Crescent dough sheets
1/4 cup mayonnaise
1/2 cup chopped cooked chicken (about 1 chicken breast)
1 cup shredded sharp cheddar cheese
1 cup chopped broccoli, cooked (you'll need about 1/2 of a 10-oz box of frozen chopped broccoli)
1/4 tsp salt
1/4 tsp pepper
1/4 tsp garlic powder

Preheat oven to 350. Line a baking sheet with parchment paper. Unroll the dough and cut it into four equal portions. Mix remaining ingredients together in a bowl. Divide filling equally among the four squares of dough, fold the dough over the filling and make a pocket by pinching the sides together.

Bake for 20 minutes or so until golden brown.