Tuesday, August 30, 2011

Golden Corn Chowder

I love soup.  Like, really, really a lot. 

This is the first installment of my new Soup category of recipes.  I have lots of soup recipes that I make all winter long.  Soup is the redeeming factor of winter.  Well, along with Christmas.

I have to wonder about the mental well-being of anyone who loves winter. 

But this soup is special, because it's actually a fall soup instead of strictly a winter soup.  Simply because it calls for corn and does it get any better than fresh corn?  I think not.

This stuff is addictive.  It's sweet from the onions melted in butter and the corn; it's thick and more chowder-y than soup-y; it's cheesy (need I say more?) and it has bacon on top, people.


People from all over the world have asked for this recipe.  Actually no.  But they would if they knew how good it is.

And now it's on the internet.  I guess it's true that you can find anything on the internet.  Thanks to Al Gore.

I make it all fall long with fresh corn.  And all winter long with frozen corn.  Works beautifully both ways.


There's a lot of chopping to be done for this pot so let's get going. 


Start with some butter in a pan:

And add in some chopped onions.

We're going to let these onions cook in the butter until they get super soft and sweet.  This will probably take about 15 minutes over medium heat.  Stir them a lot so they don't brown.

And then stir in some flour.


It will look kind of pasty, but that's exactly right.  Just cook it for a minute to cook out the flour taste.  The flour will give our soup the perfectly thick consistency.

Congratulations!  You just made a roux.

Now add the seasonings.  Salt, pepper and turmeric.  I love turmeric.  I don't know why.  I guesss because it's a gold color.

And I do love gold.


Now it's time to add the chicken stock.  Store brand stocks are just as good as name-brand.  The brand really doesn't matter, as long as it says stock instead of broth. 

And if you have homemade chicken stock in your freezer, pass Go and collect $200.


Turn your heat up to medium-high and use a whisk and stir in the chicken stock into the onions and flour.  It will take a while for it to all incorporate, but keep stirring.  Once it comes to a boil, it is as thick as it will get. 

And now it's time to add the potatoes!

Ths is the second reason that this soup is called Golden Corn Chowder.  Because these are Yukon Gold Potatoes.  And if you caught the first reason - gold-colored turmeric - well, then you get a gold star for paying attention.  And the third reason is the corn. 

It's a gold trifecta.

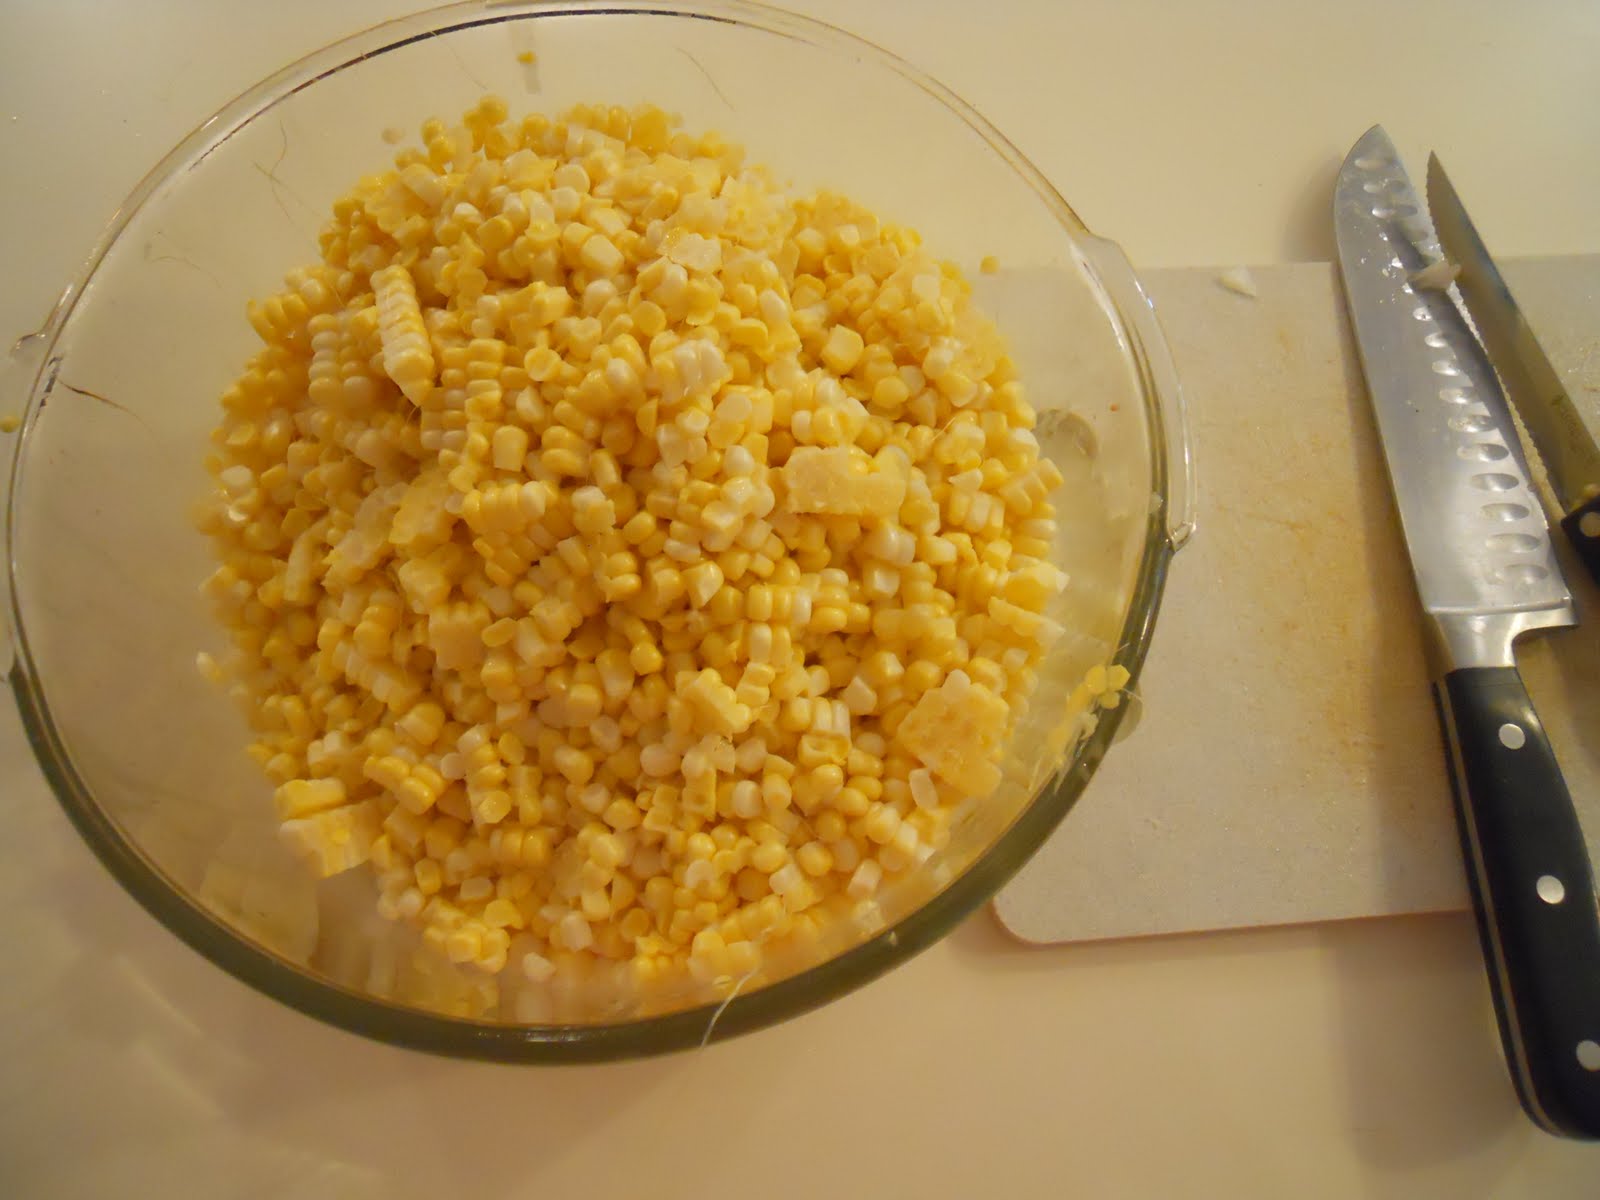
Bring the potatoes to a boil.  While that is happening, you can work on the corn.  Shuck it and cut it off the cob into a big bowl.  And make sure you run the back of your knife down the cob after you cut off the kernels - this gets out all of the corn milk stuff and makes the soup creamy.


Once the potatoes have boiled for ten minutes, it's time to add the corn.  Return it to a boil and simmer for another ten minutes.

And while it's boiling, grate up a pound of white cheddar. 

Yesterday I promised you a recipe with a pound of cheese on it.  And I try to always make good on my promises.
I could sing a whole song about how much I love white cheddar.  And I'm not even musical.

Now it's ready! 

Oh, wait.  I almost forgot the half-and-half. 


And the hits just keep on coming.  (Name that movie.  Hint: Tom Cruise in the 90s.)

Oh, and throw in half of the cheddar that you grated up a minute ago.


And stir it up.


Now dive in and eat your way out.

Or you can ladel it into a bowl and top with more cheddar.


You won't believe how good this stuff is.

Corn Chowder
Inspired by Ina Garten

4 T butter
2 large yellow onions, chopped
1/2 cup flour
3/4 tsp turmeric
2 tsp salt
1 tsp pepper
2 cups large-diced Yukon Gold potatoes (this is a little less than a pound)
6 cups chicken stock
12 ears fresh corn, shucked and cut off the cob (or 2 1-lb. bags of frozen white shoepeg corn)
16 oz white cheddar cheese, shredded and divided
1 1/4 c half-and-half

On medium heat, add the butter to the pot and then add the chopped onions.  Cook about 15 minutes or until very tender.  Add flour, turmeric, salt and pepper and stir until combined.  Cook 2 minutes.  Add the chicken stock and stir until it is incorporated with the flour and onions.  Bring it to a boil and then add the potatoes.  Simmer for 10 minutes.  Add the corn and return to a boil.  Simmer another 10 minutes.  Check the corn and potatoes and make sure they are done.  Remove from the heat.  Add 8 oz of the cheese and the half-and-half.  Stir until the cheese is melted.  Ladel into bowls and sprinkle more cheese on top.

Monday, August 29, 2011

Veggie Sandwich

It's Monday.

Normally I would post something ridiculous, like a dessert or a recipe containing precisely one pound of cheese.

But I'm not going to do that to you today.

I'm going to save those recipes for tomorrow and Wednesday.


Today, I'm just going to tell you about this veggie sandwich that I
like to eat.


It's good in every way.  I would say that it's good and good for you, but that corny phrase annoys me.  It makes me not want to eat whatever is being described.


My inspiration was Panera's Mediterranean Veggie sandwich.  That's what I usually get at Panera, seeing how it's the only sandwich under 1,200 calories on their menu.


I used to make this sandwich on regular bread, but then these things came out:

And these things are just perfect for this.  Surprising that they even contain 100 calories, seeing that they're translucent and all.  But for what they are, they really are pretty good.  If you like sawdust, that is.  Kidding.

Spread hummus on one side of the bread.  Be generous, since there isn't much to this sandwich.  I always use the cilantro version, but the roasted red pepper one would be delicious too.

And then layer on the veggies...starting with cucumbers


And tomatoes


And onions and red bell peppers


Do you like my star pattern I made with my bell pepper?

I did that just for you.

And a little bit of cheese.  Feta is best, but I was out.  So I used a slice of Swiss and that was a good choice.


Go make this so you can have Corn Chowder tomorrow.  As promised, it does have a pound of cheese in it.

Veggie Sandwiches
For one sandwich:

1 sandwich thins
Hummus
Thin slices of cucumber
Thin slices of tomato
Thin slices of red onion
Thin slices of red bell pepper
Thin slice of feta cheese (or a few crumbles)

Generously spread hummus on one side of the bread.  Top with cucumbers, tomatoes, red onions, bell peppers and feta cheese.

Thursday, August 25, 2011

Aunt KK's Special K Cookies

So I've posted two dessert recipes two days in a row.  In the middle of the week.  What of it?


Get off my case.  Because these aren't even a dessert.  These have cereal in them, okay?


So that makes them a breakfast food.


I feel much better now.


These things are fantastic.  They're called cookies but they're not really cookies.  (Breakfast, remember.)  They're more like a bar except that they're not.  They're kind of like Rice Krispy Treats.  Except they're not that either.

I had no idea these were so complicated.  Because they're so not.

It's just a no-bake drop cookie.  But it's not that either, because it's so much better than that.


And they're ah-mazing.  I ate half of the last batch I made.  And I won't tell you who ate the other half, except to say that it was my mom.

I have Katie to thank for these cookies.  Or to blame.  Not sure which.  I guess I'll have to make another batch and then decide.

Everyone thinks we're sisters, and we usually just smile and nod to the question.  Except that would be weird if she were actually, considering that she is married to my brother.  (Please leave your hilarious "But you are from Kentucky" jokes in the comments section.  Thanks.)

Let's make breakfast!  So put some brown sugar and white corn syrup in a saucepan. 


And bring it to a boil.  Boil it for a few seconds before you turn it off.


Now dump in the rest of the ingredients.  Told you this was complicated.


Stir them up!  And drop them on wax paper. 


And now you can make a healthy breakfast for your family, too.

Aunt KK's Special K Cookies

1 c brown sugar, packed
1 cup white corn syrup
1 cup creamy peanut butter
1 cup salted peanuts (without the skin on)
6 c original Special K cereal

In a saucepan, bring brown sugar and corn syrup to a rolling boil and boil for exactly 30 seconds.  Remove from heat and stir in peanut butter and peanuts.  Add cereal and stir until cereal is coated.  Scoop into large cookie-sized mounds onto wax paper and cool. 

Wednesday, August 24, 2011

Homemade Ice Cream Sandwiches

I don't think this recipe needs much of an intro or an explanation.  It's called homemade ice cream sandwiches for pete's sake. (And who the heck is Pete?)


Basically you make two really delicious chocolate cookies and, while they're still slightly warm, smash a scoop of vanilla ice cream in the middle of them.  And then you eat it immediately.

It's better than anything you can buy in the freezer section.

I had to do a "test run" of these sandwiches last week on vacation.  My family just hates helping me out on this blog thing.  Because "helping out" means that they have to eat things like two large cookies and ice cream at the same time.

How will I ever thank them.

You start with a basic cookie dough.  Butter, sugar, eggs, you know the drill.  Then stir in the dry ingredients (cocoa powder, flour, salt and soda) and here's what you have:


Hello.  A cookie dough that tastes like brownies. 


And so you scoop them out and bake them.


And while you're baking you get this out and let it get soft...


And then you lay one cookie face-down on your plate


And cover it with said softened ice cream


And another cookie makes a sandwich.  See how the top cookie is still a little gooey?  Oh. My. Word.


I think the Sandwich King would be proud.  Even if he is a Yankee.

Homemade Ice Cream Sandwiches
Inspired by Barefoot Contessa

2 sticks butter
1 cup brown sugar, packed
1 cup sugar
2 eggs
1 1/2 tsp vanilla
2/3 cup cocoa powder
2 cups flour
3/4 tsp kosher salt
1 tsp baking soda
7 large scoops Breyer's vanilla bean ice cream, softened

Cream the butter and two sugars together in a mixer.  Add the eggs and vanilla and combine.  Add the cocoa powder, flour, salt and baking soda and combine just until mixed together. 

Use an ice cream scoop to scoop the cookies on a cookie sheet.  It should make exactly 14 cookies.  Bake on 350 degrees for 12 minutes.

When the cookies are done, let them cool for a few minutes until you can handle them.  Make 7 sandwiches with the cookies and the ice cream and serve immediately. 

Saturday, August 20, 2011

Cilantro-Lime Rice

In case you hadn't noticed, I have a thing about cilantro.  And lime.  And cheese.  But this recipe doesn't have cheese.

It only has lime and cilantro.  Two out of three ain't bad.

It's all Qdoba and Chipotle's fault.  I love their rice.  So I had to figure out how to make it at home.

The good news is that it's stupid-easy.  And it's awesome with Chile-Lime Grilled Chicken, Fresh Pico, and Tomatillo Salsa.  And Guac, of course. 

The possibilities are endless.

Start by boiling some chicken stock in a sauce pan.  Chicken stock gives the rice so much more flavor than just cooking it in water.

When it boils, stir in the rice and cook it for 20 minutes or so until it's done.


And chop up some cilantro and throw it in.

Squeeze some limes

And stir it all together.


Love this rice.

Cilantro-Lime Rice

4 cups (1 quart) chicken stock
2 cups white long-grain rice
1 tsp salt
1 bunch cilantro, chopped
Juice of 3 limes
Zest of 1 lime

Bring chicken stock to a boil in a large sauce pan.  Stir in the rice and salt and return to a boil.  Reduce to a simmer and cover; cook about 20 minutes or until the rice is done. 

When rice is done, stir it up and add the chopped cilantro and lime juice and zest.  Serve immediately.

Thursday, August 18, 2011

Marinated Grilled Zucchini

There's this restaurant in Lexington called Ramsey's.  It's absolutely fabulous.  It's perfected the "meat and three."  If you don't know what "meat and three" is, then you must not be from the South.  And you should go google "meat and three."  And then google "Is google capitalized when used as a verb"?

So Ramsey's grilled zucchini is unparalelled.  I always choose it to be one of my "three" vegetables.  Along with creamed corn and fried banana peppers.  See?  Told you to eat at Ramsey's.

And since we have buckets of zucchini, I decided to try and grill it at home.

It went very well. 

So I'm sharing it with you.

First, slice the zucchini longways like this:

It's easy to grill this way.

Then toss it in a zipper bag and pour over the balsamic vinaigrette.


Let it marinate for a good couple hours.

You know, Dale's Seasoning would be a great marinade, too.  I love Dale's.  Totally different from balsamic vinaigrette, but totally awesome.

Now we're ready to grill!

They need to go for about 8 minutes per side.


When it's done, pour the extra balsamic vinaigrette over the zucchini.  The hot zucchini will soak up even more flavor from the vinaigrette.  Yum.


Marinated Grilled Zucchini

2-3 zucchini, ends trimmed and sliced lengthwise into planks
1/2 cup balsamic vinaigrette

Place the zucchini planks into a food zipper bag.  Pour over the vinaigrette.  Shake the bag around to make sure all the zucchini has contact with the dressing.  Marinate in the refrigerator for 2-4 hours. 

When read to cook, preheat the grill.  Grill over a medium flame for about 8 minutes per side, or until they are as tender as you like.  I  like tender zucchini, so I let them go the full 8 minutes per side.

When the zucchini are done, place them on a plate and pour the remaining marinade over.

Friday, August 12, 2011

Oven-Dried Tomatoes, Packed Two Ways


It's tomato month at our house. 


When it rains, it pours.  Tomatoes, that is.


I love to make Bacon, Tomato and Blue Cheese Sandwiches and White Cheddar Grilled Cheese with Tomatoes and Pesto.  And Israeli Couscous Salad.

I know I'm not the only one with tomatoes running out of my ears.


But when tomato season is over, I just might cry.

And then I will feel better when I see these Oven-Dried Tomatoes in my fridge and in my cabinet.

It doesn't get any easier than this, people.

Slice some Romas in half and put them on a baking sheet.  Sprinkle them with salt.

Slow-roast them at 250 degrees for several hours.  Be patient, because it will take several hours.

Here they are after a couple hours:


They're just beginning to shrivel and dry.

They're almost done here:


And now they're done!  Yay.

When they're dry, let them cool to room temperature.  And then you can put them in a zipper bag and either throw them in the fridge, freezer, or put them on the counter.  And use them just like you would sun-dried tomatoes that you bought at the store.


Or you can pack them in a jar with garlic, thyme, and olive oil and put them in the fridge.  Now you'll have sun-dried tomatoes packed in oil, AND flavored olive oil.  I mean, how cool is that?


I made a double batch and tried storing them both ways.

If you pack them in some special jar, they would make a great gift.  The garlic and thyme look so neat.

So go put some tomatoes in your fridge so you can enjoy tomato season in November, too!

Oven-Dried Tomatoes, Packed Two Ways

30 Roma (or plum) tomatoes
1 tsp kosher salt

Wash the tomatoes well.  Trim the stem off and slice the tomatoes in half.  Line the tomatoes, cut side up, on a 12x18 baking sheet. 

Bake on 250 degrees for about 4-6 hours, until the tomatoes are dried and shriveled but not brittle.

Remove from the oven and allow the tomatoes to cool to room temperature. 

Pack in plastic zipper bags.  You can store in the freezer, fridge, or at room temperature.  They last a long time.

Or you can pack in olive oil with garlic and thyme.  Take a jar, fill it loosely with the dried tomatoes, smash three garlic cloves and place them in the jar along with a little bundle of thyme.  Pour extra-virgin olive oil over the tomatoes and cover.  Store in the refrigerator.