Thursday, August 29, 2013

Cheeseburger Wraps

I suppose you could say I'm on a cheeseburger kick.


By the way, if you haven't made the Basil Burgers yet, go make them.  Now.  And then come back and read this.

Those burgers are SO GOOD!


But these wraps aren't about that post.  So I'll stop talking about the best burgers of my whole life.


And I'll tell you about these cheeseburger wraps.  They were great.  My kids all loved them.


It was a super easy way to make a cheeseburger.

And I don't need to remind you for the fifty-millionth time how much I love wraps.


There's just something about eating your dinner wrapped up in a tortilla.  I love it.


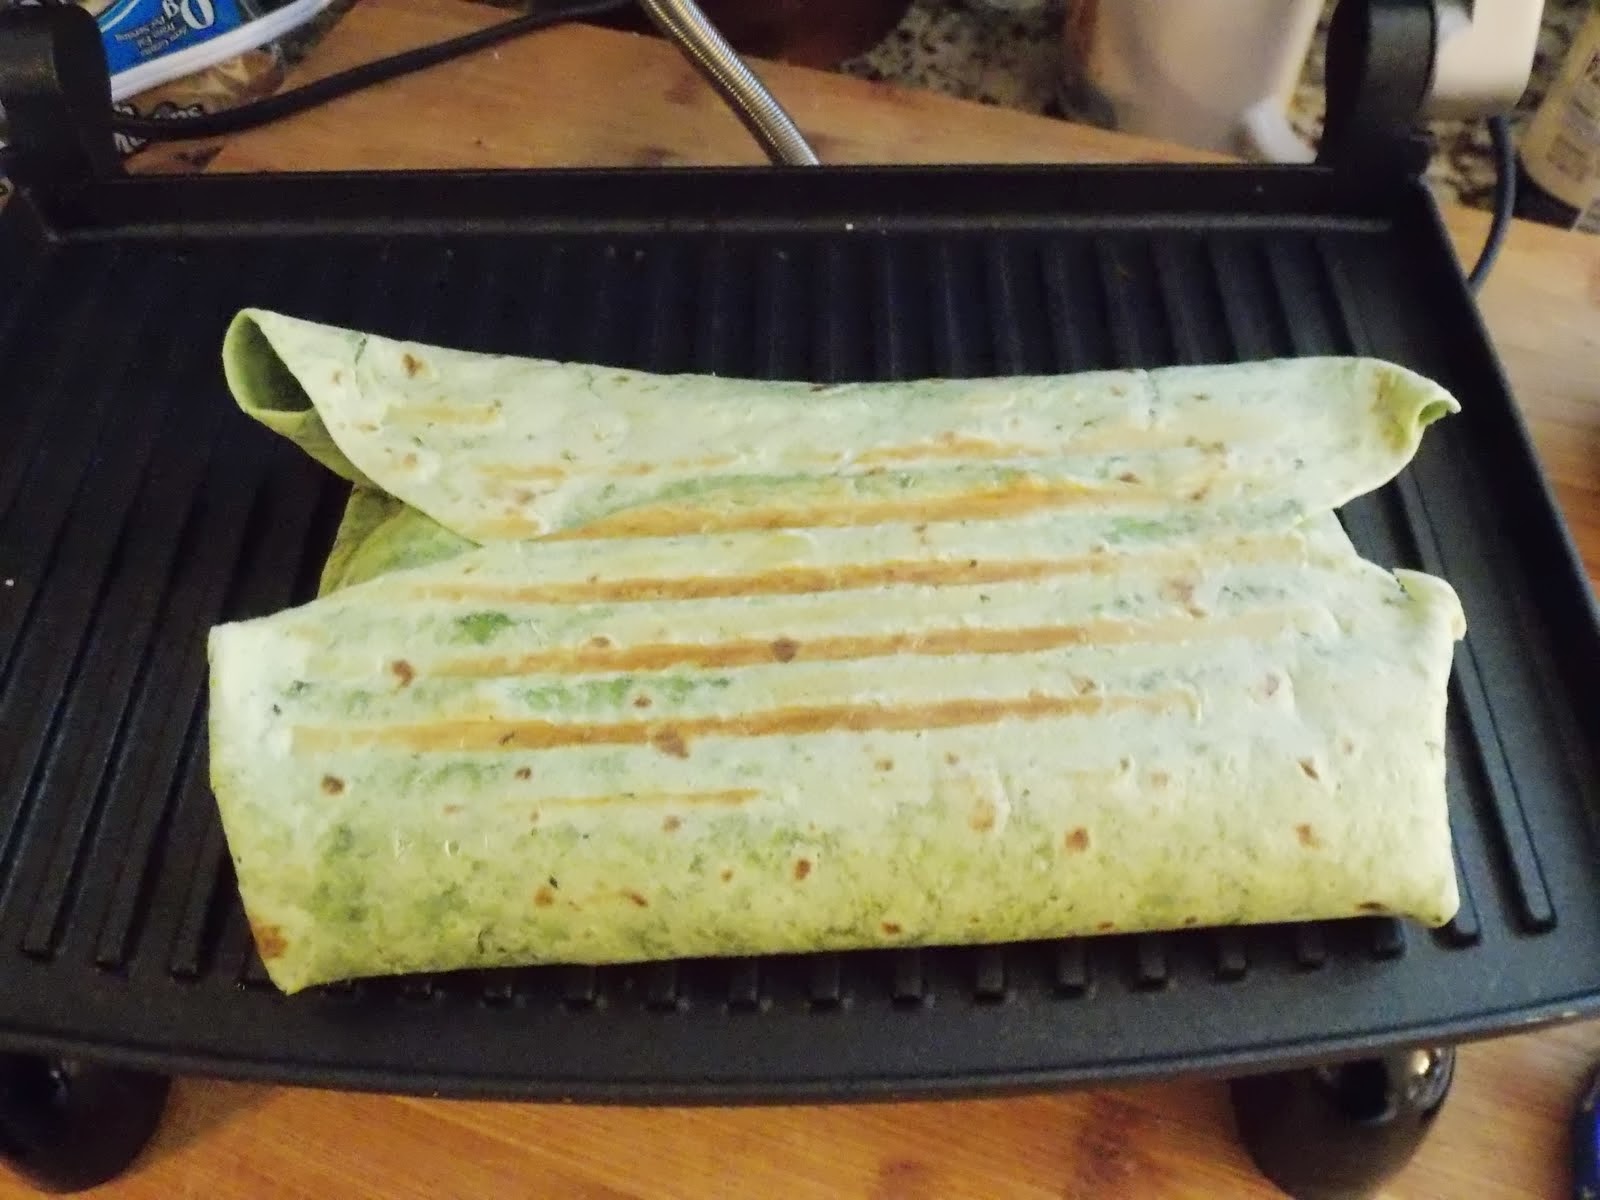
These had all the great flavor of a cheeseburger with a slightly different texture...browned beef and onions instead of a grilled patty; tortilla instead of a bun.


It's a twist on a cheeseburger. Very easy and delicious.   I'll definitely be making these again.  Soon.

Cheeseburger Wraps
Adapted from Six Sisters

1 lb. ground beef (I like 80/20)
1 onion, chopped small
3 T ketsup
2 T mustard
2 T Worcestershire sauce
1/2 tsp salt
1/2 tsp pepper
5 wraps (Flat Outs are good or you can use large tortillas)
1 1/2 cups shredded cheddar cheese
Toppings: sliced tomato, shredded lettuce, pickles (or pickle relish)

Brown the beef and onion together, crumbling the beef, until cooked through.  Drain the grease and return the beef to the pan.  Add the ketsup, mustard, Worcestershire sauce, salt and pepper.  Combine well.

Spread the cheese evenly on the wraps.  Top with the ground beef mixture.  Top with the toppings.  Toast the wraps, seam side down, in a skillet or on a grill pan for a few minutes until the cheese is melted (I toasted mine for about 4 minutes/side and it was perfect).

Tuesday, August 27, 2013

Basil Burgers

Sometimes you just know when things are in your life to stay.


Like our house.  When we walked in the door, we knew it was our house.

Or like these burgers.  A little less expensive than a house, but (maybe?) equally life-changing.


My brother and sister-in-law brought this recipe on vacation this year...totally one of the best things I've ever eaten.  

In my life.


People.  I'm serious.


So it's an Italian burger - full of sundried tomatoes, pesto, garlic, etc., topped with provolone cheese and pesto mayonnaise.  On a toasted bun.  Lettuce and tomato optional.  It's like an Italian meatloaf on a bun.


My mouth is watering as I type this.  These burgers are beyond description.  They're super moist, beyond flavorful with the garlic, pesto, chewy and sweet sundried tomatoes...cheesy...


Mmmm.


By all means, make these.  You won't even believe how fabulous they are.


Basil Burgers
Adapted from Epicurious

For the burgers:
2 pounds ground beef (80/20)
1/4 cup white wine (could substitute chicken stock)
3 T pesto
1/4 cup minced red onion
1/4 cup Italian breadcrumbs
8 sun-dried tomatoes packed in olive oil, chopped
2 tsp garlic salt

For serving:
6 slices provolone cheese
6 large buns, split
6 tomato slices
12 basil leaves
Pesto Mayonnaise (3 T pesto whisked with 2/3 cup mayonnaise)

In a large bowl, mix together the beef, white wine, pesto, onion, breadcrumbs, sun-dried tomatoes and garlic salt.  Use your hands to combine (but don't overmix the burger mixture!) and then form into six equal patties. Make a small indentation in the middle of each burger (as they cook, the middle will puff slightly).

Grill burgers until nearly all pink is gone, 5-6 minutes on each side.  Don't squish the burgers with the spatula while they cook!  (If you press the burgers, the juice will run out and the burgers will be dry.)

Place the cheese on the burgers for about the last 30 seconds of grilling.  Toast the buns and assemble the burgers with the tomato slices, basil leaves and a generous dollop of pesto mayonnaise.

Wednesday, August 21, 2013

Creme de Menthe Brownies

I have already told y'all about Thelma.


Many of Thelma's recipes are staples in our family.


Like these brownies.  Every party.  These brownies.  Without exception.

People.  They're ah-mazing.

Here's the breakdown.  Fudgy brownie.


Creme de menthe layer.


Ganache on top.


Must serve chilled.


Heavenly.

Here's the rules.  Don't overbake the brownies.  And then cool them completely before trying to schmear the creme de menthe layer on.  Also, I think this chocolate syrup is the key.


Creme de menthe: find it in a liquor store.  You probably figured that.  There are two types: clear and green.  If you buy the clear kind (like I did), then you need to add 2 drops of green food coloring.  If you buy the green kind, leave the food coloring out.


Ganache: don't overheat it.  You want it to be glossy and shiny.  If you overheat it, it will be dull and I will be mad at you.  Don't be dull is what I'm saying.


Chill them all together for several hours - overnight is even better - and then cut them into itty bitty squares to serve.

The smaller you cut them, the more you can eat!  You can make up the rules next time.

Go forth and be creme de menthed.  And don't have a party without them.

Creme de Menthe Brownies
Recipe from Thelma Linton

Brownies:
1 stick butter, softened
1 cup sugar
1 tsp vanilla extract
4 eggs
1/2 tsp salt
1 cup flour
16 oz. can Hershey's chocolate syrup (find this with the ice cream toppings)

Creme de Menthe Layer:
1/2 stick (4 T) butter, softened
2 cups powdered sugar
2 T creme de menthe
2 drops green food coloring (use only if you use clear creme de menthe; no food coloring necessary if you use green creme de menthe)

Chocolate Ganache:
1/2 stick (4 T) butter
1 cup (6 oz.) semi-sweet chocolate, chopped (or use chips)

For the brownies, cream together the butter and sugar until light and fluffy - about 3-4 minutes with an electric mixer.  Add the vanilla and mix.  Add one egg at a time and mix completely after each addition.  Add the salt and mix.  Add the flour alternately with the chocolate syrup, beginning and ending with the flour.

Pour brownie batter into a greased 9x13 baking dish.  Bake in a 350 degree oven for 24-25 minutes (do not overbake!).  A knife inserted in the middle should have a few moist crumbs sticking to it.  Allow the brownies to cool completely.

For the creme de menthe layer, cream together the butter, powdered sugar and creme de menthe until smooth.  If you used clear creme de menthe, then add two drops of green food coloring and mix until incorporated.  Spread evenly on the cooled brownies.

For the chocolate ganache layer, place a heat-proof bowl (I use a Pyrex bowl for this) over a pan of simmering water.  Do not let the water touch the bottom of the bowl.  Melt the butter and chocolate in the bowl until smooth and shiny.  Stir it often.  Pour it on top of the creme de menthe layer and smooth it evenly on top.

Refrigerate the brownies for at least 4 hours or overnight.  Cut into small squares and serve.

Monday, August 19, 2013

Butterscotch Zucchini Bread

I made this bread a few weeks ago.  We liked it, so I'm sharing it with you.

This is how I cut bread.  Is there a problem?
And now I need to tell you that our big girl started kindergarten last week.  It is only half day, but it is every day, and it is still kindergarten.


It is bittersweet.

I am happy and sad.


And I'd like to publicly apologize to all the parents I scoffed at (when I was young and stupid, i.e., before I became a parent myself) who were emotional because their child went to kindergarten.


I was sure I would never be that parent.  You know, the overly-attached, enmeshed parent.


And here I am.  Crying because my little girl went to kindergarten.


I mean, where did the last five years go?


I'll stop.

Have some zucchini bread.  It's good because you can't taste the zucchini.  You know it's true.


And put some butterscotch pudding mix in it.  Because we all  know by now that pudding mix makes everything better.

Butterscotch Zucchini Bread

1/2 cup canola oil
2 eggs
2 tsp vanilla extract
1 cup sugar
1 cup grated zucchini
1 cup flour
1/2 cup oats (either quick-cook or regular; not instant)
1 tsp baking soda
1 tsp salt
1 tsp cinnamon
1/4 tsp ground nutmeg
3 oz. package butterscotch pudding

In a large bowl, whisk together the oil, eggs, vanilla and sugar.  Add the remaining ingredients and whisk (or stir) together until combined.  Pour into a greased loaf pan (I used a 9x5 pan).  Bake in a 350 degree oven for 55-65 minutes or until a knife inserted comes out clean.

Thursday, August 15, 2013

Strawberry Freezer Jam

Strawberries were $1 at the grocery!  Am I the only one that gets excited when this happens?


Anyway.  I bought (a whole) lot.  And then I had to figure out what to do with them.  We eat a lot of sliced fresh strawberries, but I bought more than five people can eat in a reasonable amount of time.


We smashed them up and made jam with them!  What else?
While the girls and I made jam, Baby Bear organized the tupperware for me.
I've never made freezer jam, but it's crazy easy.  There's no canning involved, which was good news for me.


The only annoying thing is that you need to boil the containers in which you will store the jam.  I used two tupperware containers and simply poured boiling water over the containers and lids.


To mash my strawberries, I used this great tool from Pampered Chef.  Normally I use it to break up ground beef as I brown it, but it worked as the perfect strawberry chopper.  If you don't have this cool tool, then you could use a potato masher.


And so now you need to stir in four cups of sugar.  Yes.  Four entire cups of sugar.  Let the strawberries sit for about 10 minutes.  Stir them occasionally.


While that sits, put a pot on the stove.  Add some water and a packet of fruit pectin.  Boil it for one minute.


Pour it into the strawberry and sugar mixture.  Stir it around for about three minutes, until most of the sugar is dissolved.


Now you're ready to pour the jam into the containers!  And then let it sit on the container for 24 hours.  An entire day.


And then freeze one container.  And make lots of peanut butter and jelly sandwiches with the other container.  Or you could make these bars.  I haven't done that yet, but I'm going to.


The jam is really delicious.  It tastes like straight-up fresh strawberries.  So good and so easy.  My kids loved doing it, and they love eating something that they made.  (Not that it's hard to get your kids to eat jelly, but you know what I mean.)


Strawberry Freezer Jam
Adapted from Kraft

1 lb. strawberries, hulled, sliced and mashed to make 2 cups of mashed strawberries
4 cups sugar
1 package fruit pectin (I used Sure-Jell)
3/4 cup water

Pour boiling water over three 2-cup containers and their lids to sterilize the jam containers.  Set aside to use in a minute.

Put the mashed strawberries in a large bowl and stir in the sugar.  Let it sit for about 10 minutes, stirring occasionally.

Meanwhile, bring the water to a boil in a small saucepan.  Stir in the fruit pectin and boil it for one minute. Pour it over the strawberry/sugar mixture and stir it for about 3 minutes, until most of the sugar is dissolved.

Pour the jam into the containers and put the lid on.  Sit on the counter, at room temperature, for 24 hours. Freeze the jam for up to a year or refrigerate the jam for up to 3 weeks.

Tuesday, August 13, 2013

Coconut Chicken with Sticky Sauce

I made this coconut chicken a few weeks ago, and it was awesome.  Totally.


It's easy.  Just marinate the chicken, grill it, and pour some sticky sauce on top.

Yum, y'all.

There's very few ingredients, and you use ginger in both the marinade and the sticky sauce.


I love ginger and I love using the same ingredients in two things.

So!  Here's what you need to know.  Let the chicken marinate for plenty of time.  Like overnight.  Yeah, that's good.


And the sauce?  Don't burn it.  Been there.  Done that.  Warned you.  So don't burn it.  (And you burn it by turning it on high, walking away from the stove to feed the dog, pick up the baby, put down the baby to break up a fight between the girls, clean up the dog water that the baby dumped out and threw all over the kitchen, pick the baby up again, and put the dog outside.  That sounds about right.)  I threw away my pan (okay, not really, but I would have rather thrown it away than soak it, scrub it, soak it...) and made a second batch of sauce.


The second batch was perfect.


And this chicken was perfect.  I'm making it again this week.  And that's sayin' somethin' since I don't repeat meals as often as my husband wishes I did.

Coconut Chicken with Sticky Sauce
Adapted from Simply So Good

4 boneless skinless chicken breasts, sliced into strips
1 can coconut milk (lite is fine)
2 T grated fresh ginger
2 garlic cloves, minced or grated
2 T soy sauce
1 tsp red pepper flakes (I left these out because my kids don't like too much heat)

Sticky Sauce:
3/4 cup rice vinegar
1/2 cup sugar
1/4 cup soy sauce

Sliced green onions, black sesame seeds and red pepper flakes, for garnish
Hot cooked rice, for serving

Place the chicken in a gallon food storage bag.  Add the coconut milk, ginger, garlic, soy sauce and red pepper flakes and squish everything around so that it combines and completely coats the chicken.  Marinate the chicken in the refrigerator overnight.  Grill the chicken until just cooked through.

While the chicken grills, make the sauce.  Place the rice vinegar, sugar and soy sauce into a small saucepan. Bring to a boil and then reduce to medium, continuing to boil, for about 8-10 minutes, until the mixture is reduced to about 3/4 cup.  Watch the sauce as it cooks since it will burn.

Pour the sauce over the chicken. Garnish with green onions and black sesame seeds and serve with rice.