Wednesday, October 30, 2013

Sunrise Muffins

I watched Pioneer Woman make these muffins a few weeks ago (I told you I was on a PW kick!).  I thought they looked great, but she used a combo of butter/shortening and cut it into the dry ingredients with a pastry cutter.


I hate cutting fat into flour.  It's just an annoying step I'd rather avoid.  And I think that oil makes things moister than butter, so I try to use oil in my muffins.

By all means, learn from my mistake and use a bigger bowl.  I made a huge mess.
But then I run into another problem...if I only use oil, I miss that buttery flavor.


Life is so complicated sometimes.

And then I read the reviews of these muffins on foodnetwork.com and they didn't get great reviews.  Everyone said they were not sweet enough.


Well, I solved that problem.  And I mixed oil with butter-flavored shortening to solve the moisture/butter-flavor problem.  And lastly, to solve the "cut the fat into the flour" problem, I melted the shortening.  No cutting necessary.


Just stir it together!


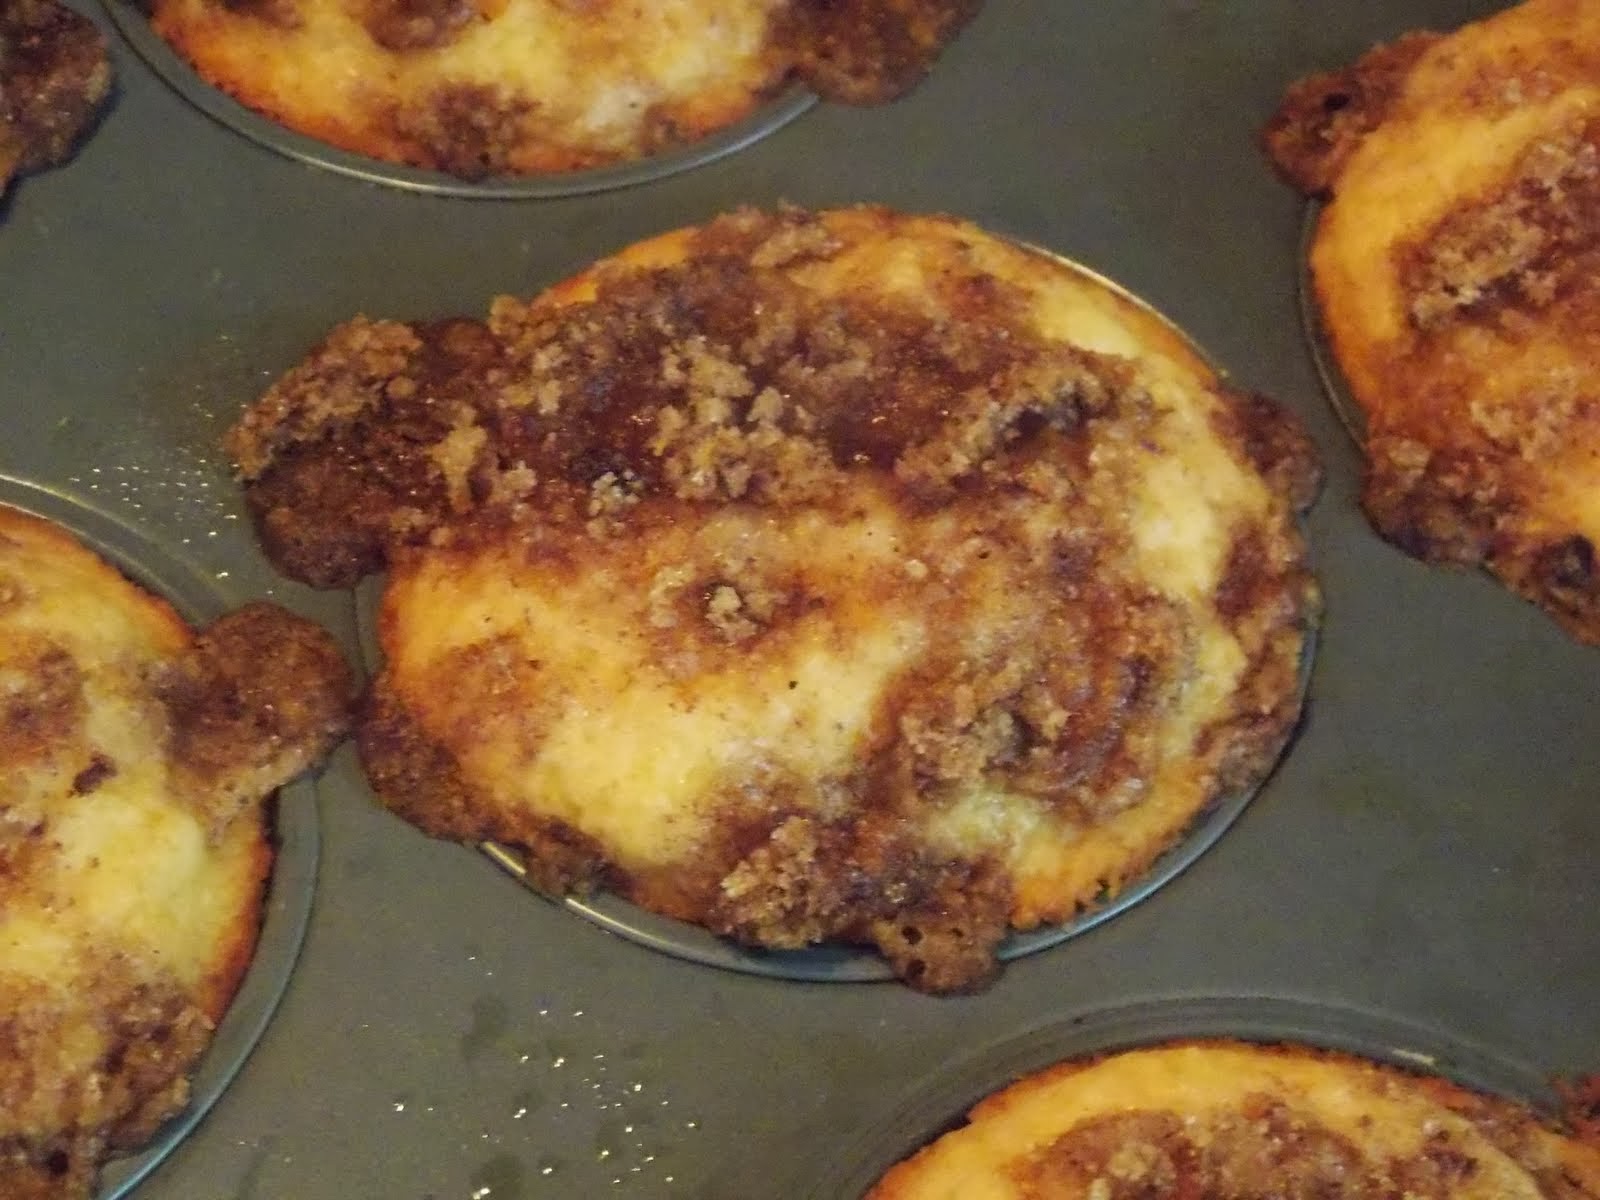
My family loved these muffins.  They were orange-y without being bitter, very moist and had a great crumb topping.


Needless to say, I'll be making these again.  For sure.

They were great with cheesy eggs and fruit!

Sunrise Muffins
Inspired by Pioneer Woman

1/4 cup canola oil
1/4 cup butter-flavored shortening
3/4 cup sugar
1 tsp vanilla extract
1 cup (about a 10-12 oz. jar) orange marmalade
1/2 cup orange juice
1 egg
1 T baking powder
1/2 tsp salt
2 cups flour

Topping:
1 T butter, melted
1/4 cup brown sugar
1/4 cup sugar
1/4 tsp salt
1 tsp cinnamon
1 tsp nutmeg

Melt the shortening in a bowl in the microwave just until melted.  Stir in the oil, sugar, vanilla, marmalade and orange juice.  Add the egg and combine.  Add the remaining dry ingredients and stir until just combined.

Scoop into muffin tins that have been well greased with cooking spray.  This recipe makes 12 muffins.

For the topping, whisk together the melted butter with the remaining ingredients.  Sprinkle about a teaspoon over each muffin.

Bake in a 350 degree oven for 13-16 minutes, until just set in the middle.

Monday, October 28, 2013

Angel Hair with Tomatoes and Artichokes

Last year, I made this dish all the time.  And then I forgot about it!  Until the other day...I made it again.  And I remembered why I made it all the time last year!


It's a pasta that I love...not so much my husband.  He doesn't do artichokes.


But I adore artichokes!  And pasta, and cream and tomatoes.  That's my kind of meal.  There's no meat, which doesn't bother me.  But sauteed chicken would be great in this if you want to make it a main dish for your family.


Just start out with some butter and olive oil.  I'd say that's a good start to any dish.


Saute some garlic and onions.

Add the tomatoes and artichokes, saute for a second, then dump in the cooked angel hair.  Do not even think about using fat spaghetti.  For this dish...or any dish.

Fat spaghetti is not allowed in my house.


Then add the cream!  Or half-and-half.  I used half-and-half, because it's what I had.  So use whatever you  have.  It will be delicious.


Serve it up with lots of Parmesan.  Yummy yummy!

A perfect fall dish, and you probably have most of these ingredients in your pantry.


Another Pioneer Woman favorite.  Thanks, PW.

Angel Hair with Tomatoes and Artichokes
Adapted from Pioneer Woman

8 oz. (1/2 lb) angel hair pasta, cooked in salted boiling water according to package directions
1 T olive oil
2 T butter
1 onion, chopped
4 cloves garlic, minced
15 oz. can tomatoes, not drained
15 oz. can artichoke hearts, drained
1/2 cup chicken stock
3/4 cup half-and-half
1/2 tsp salt
1/2 tsp pepper
1 cup Parmesan cheese, grated

Saute the onion and garlic in the butter and olive oil over medium heat until soft, about 8-10 minutes.  Add the tomatoes and artichoke hearts and simmer for a couple of minutes.  Add the chicken stock and stir in the cooked pasta.  Add the remaining ingredients, saving about 1/2 cup Parmesan for the top.  Check for seasonings and add more salt/pepper if you need it.  Just don't oversalt it, because the Parmesan is plenty salty!

Sprinkle the remaining Parmesan on top of each serving.

Wednesday, October 23, 2013

Sour Cream Noodle Bake

I'm on a Pioneer Woman kick these days.  I just love her!  I can't wait to show you these muffins I made the other day...


But for now, it's Sour Cream Noodle Bake.  I was hooked at the title.  We love sour cream 'round here.  And noodles?  Yes, pasta please.  And bake.  Do I even need to go there.


So yeah, we all liked this.  It's not overly Italian - it really is just a noodle bake.  The noodles are so creamy, the sauce is nice and meaty without being too much, and the cheese...well, cheese speaks for itself.  It stands alone.


If you hate cottage cheese, then please get over yourself for once and just use it in these noodles.  You won't know it's there...it'll just be very creamy and yummy!


Trust me.


Oh!  And one of the things that I liked about this is that it doesn't make a huge dish like some casseroles.  It's kind of nice to not have an enormous amount of leftovers sometimes, you know?


But if you want a huge dish, just make double.

Sour Cream Noodle Bake
Adapted from Pioneer Woman

1 lb. ground beef (I use 80/20)
1 onion, chopped
3/4 tsp salt
1 T sugar
15 oz. can tomato sauce
12 oz. dry egg noodles
1/2 cup sour cream
1 1/4 cup small-curd cottage cheese
1/4 cup chopped green onions
1/2 tsp pepper
1 1/2 cups shredded cheddar cheese

Brown the onion and the meat in a skillet, breaking up with a wooden spoon.  Drain the grease.  Add the salt, sugar and tomato sauce to the meat in the skillet and simmer on low for about 20 minutes while you make the noodles.

Cook the noodles in boiling salted water according to package directions.  You don't want them to be mushy, though, so don't overcook!  Drain the noodles and return them to the pot.  Add the sour cream, cottage cheese, green onions and pepper.  Stir to combine.

Spray a 2-quart baking dish with nonstick cooking spray.  Spread half of the noodles in the dish.  Cover with half of the sauce.  Sprinkle half of the cheese on top.  Do another layer - noodles, sauce, cheese - and bake in a 350 degree oven for about 35-40 minutes, until hot and bubbly.

Friday, October 18, 2013

Sausage Brownies

These sausage brownies are such a great breakfast!  Hot, creamy, cheesy...and who doesn't love crescent rolls???


I used turkey sausage, and the flavor was delicious.  Great taste and the turkey sausage is very lean.  I will definitely use the turkey sausage again!


These are easy to assemble.  Layer crescent rolls in a dish.  Next is the turkey sausage and cream cheese mixture.  I used plain cream cheese but I think the jalapeno cream cheese would be awesome!


Sprinkle cheese on top.  I used cheddar...but pepper jack would be delicious.


Lay another package of crescent rolls on top, and bake it!


Cut and serve.  So good.  I took this to MOPS and it was a hit with my friends.  Will be making this again soon!

Sausage Brownies
Adapted from several recipes on Pinterest

2 8oz. tubes Crescent roll sheets
1 lb. roll turkey sausage
8 oz. cream cheese (jalapeno cream cheese would be good too!)
2 1/2 cups shredded sharp cheddar cheese

Unroll one package of Crescent rolls and lay it in the bottom of a greased 9x13 baking dish.

In a skillet, brown the turkey sausage until cooked through, breaking it up with a wooden spoon as it cooks to make small crumbles.  Turn off the heat and add the cream cheese. Stir until combined.  Spread mixture over crescent rolls in dish.

Sprinkle cheese on top.  Cover with second package of crescent rolls.  Bake in a 350 degree oven for 25-30 minutes, until golden brown on top.  Let cool for a few minutes then cut and serve!

Thursday, October 17, 2013

Salted Caramel Sauce

I have had more than one fail when it comes to caramel sauce.  I've tried several recipes, and I haven't been happy with how any of them turned out.


I even tried Barefoot's caramel sauce!  She made it look so easy, and I thought it was hard.  Mine just didn't look as luscious as hers did on TV.

The problem is, I really like jarred caramel sauce.  Apparently it's hard to beat.


But...the other day, I watched Pioneer Woman, and she made this caramel sauce.  And it looked easy.  Like, you-don't-need-a-candy-thermometer easy.


So I tried it.  And I added salt to make it salted caramel sauce (that's because I'm obsessed with Starbuck's Salted Caramel Mocha right now.  Have you had one?  Oh. my. goodness.  Get in your car and run through the drive-thru.  Even if you don't like coffee.  I'm pretty sure it's mainly milk, chocolate and caramel, anyway. Very little actual coffee.).

As it turns out?  This is very easy caramel sauce.  Even for me.  Even without a candy thermometer.


I had to improvise a bit because I didn't have the exact ingredients at home...I used cream instead of half-and-half (not a bad substitution), and I had to use dark brown sugar instead of light brown sugar.  It made my sauce a bit darker and richer (and maybe better?).


My analysis: you should make this.  It's easy (have I mentioned that yet?), delicious and probably keeps forever in the fridge.  The least you can do for yourself is to stir it into your coffee.

You're welcome.

Salted Caramel Sauce
Adapted from Pioneer Woman

1/2 stick butter
1 cup brown sugar (use dark or light brown sugar)
1/2 cup cream (or 1/2 & 1/2)
1 tsp vanilla extract
1 tsp kosher salt

Melt the butter, brown sugar and cream together in a small pan and bring to a boil.  Stir to combine.  Continue to boil over medium heat for about 5 minutes until thick and caramel-looking.  Remove from the heat and add the vanilla and salt.  Pour into a heat-proof container and cover.  The sauce will be very thin when hot and will be very thick when refrigerated.  Store in the fridge.

Monday, October 14, 2013

Stuffing Chicken

This is a great go-to recipe.  If you have chicken breasts on hand (I always do!), then you can whip this up with a few other ingredients.  Easy and GOOD!


All you have to do is lay the chicken in a casserole dish and cover it with cheese,


cover it with a sauce (made of cream of chicken soup mixed with sour cream and milk)


sprinkle dry boxed stuffing mix on top,


and pour melted butter on top!


I mean, whoever came up with this should win an award.


It's delicious.  A great fall meal.

I like to serve it with rice.  Oh, and I put a little bit of sauce on my rice.


That's just how we roll in Pithy's Kitchen.

Stuffing Chicken

4 boneless skinless chicken breasts
4 slices Swiss cheese
1 can cream of chicken soup
1/2 cup sour cream
1/2 cup milk
1 cup stuffing mix, dry (I used Stovetop cornbread stuffing)
1/2 stick (4 T) butter, melted

Lay the chicken breasts in a single layer in a 9x13 dish.  Layer the cheese on top.  Mix together the soup, sour cream and milk and pour on top.  Sprinkle on the dry stuffing mix.  Pour the melted butter on top.

Bake in a 350 degree oven for about 35-45 minutes, until the chicken is cooked through and sauce is bubbly.  Serve with rice and something green.

Friday, October 11, 2013

Stuffed Pepper Soup

When my husband and I first married, I made stuffed peppers a lot.  They were in our monthly food rotation. We loved stuffed peppers!  (Plus they're cheap.)


I hadn't made them in years, though...so when I ran across this recipe for Stuffed Pepper Soup, I had to try it.


Can I just tell you that we LOVED this soup!  It was delicious.  Very reminiscent of stuffed peppers and very easy to make.  The original recipe said to cook the rice separately.  I thought that sounded like an unnecessary extra step.  So I just cooked the rice right in the soup and it worked perfectly.


My kids really enjoyed this soup.  I made it nice and thick (not too brothy) so it was easy for them to eat.


And of course who doesn't love cheese on top!


Stuffed Pepper Soup
Adapted from The Country Cook

1 lb. ground beef (I used 80/20)
1 onion, chopped
1 large (or 2 small) bell pepper, chopped
28 oz. can diced tomatoes
8 oz. can tomato sauce
1 quart (4 cups) chicken stock
1 cup uncooked rice
1 tsp garlic powder
1 tsp salt
1 tsp pepper
1 T sugar
Shredded cheddar cheese, for serving

Brown the ground beef with the onion and peppers in a large pot over medium-high heat. Stir frequently to break up the meat and brown evenly.  Strain the grease and discard.  Return the pot to the heat.  Add the remaining ingredients (except the cheese) and stir to combine.  Bring to a boil, cover, reduce to simmer, and cook for about 30-40 minutes (stirring occasionally), until the rice is cooked completely.  Taste for seasoning (it may need more salt) and serve with cheese on top.

Saturday, October 5, 2013

Crockpot Cilantro-Lime Chicken

I made this chicken weeks ago to eat on taco night.  It was so good and so easy.


I have very few pictures and I can't even come up with an excuse why I have so few pictures.

So anyway.

I just put some chicken breasts (frozen!) in my crockpot, I squeezed in some lime juice, sprinkled in chopped garlic, cumin, salt and chili powder and cooked it on high for about 4 hours (until it was super tender and shred-able).

At the end, I shredded it and tossed in some chopped cilantro.


And we made tacos with it!  Topped with the usual taco toppings, but you could do a million other things with it.  (Enchiladas, taco salad, nachos, quesadillas, etc.)

Delicious.  Easy.  Really good leftover.

It's late.  Goodnight.

Crockpot Cilantro-Lime Chicken

6 boneless skinless chicken breasts (frozen or thawed)
Juice of 3 limes
4 cloves garlic, minced
1 T cumin
1 T chili powder
1 tsp salt
1/2 tsp pepper
1 bunch cilantro, chopped

Place the chicken in the crockpot.  Add the lime juice, garlic, cumin, chili powder, salt and pepper.  Cover and cook on high for about 4 hours, until the chicken is very tender and shreds easily.  Shred the chicken and return it to the crockpot.  Stir in the cilantro.  Keep on warm until ready to serve.  Great on taco salad, in tacos, nachos, in enchiladas, quesadillas, etc.

Tuesday, October 1, 2013

Cinnamon-Sugar Quick Bread

Well.  This recipe is a no-brainer. I made a loaf one Friday afternoon for our breakfast on Saturday morning.


Because it's fun to have a treat on Saturdays.


Except that my family came on Friday afternoon, right as the bread was coming out of the oven (it made my house smell heavenly) and devoured.  The. Whole. Loaf.  Gone.


Right then and there.


So, I did what any sensible person would do.  I whippped up another loaf of this bread and we had it.  Again.  On Saturday morning.


Quick bread.  Cinnamon-sugar layered in the middle and on top.


I mean, how bad can that be?


Right.  Get a cup of coffee because this comes together quick.


Hence the name.


Oil (makes it oh-so-moist), sugar, eggs, vanilla.  You know, the usual gang.  Plus milk.  Add the dry ingredients, stir it up.  Layer it in the pan with cinnamon and sugar.


You're supposed to let this cool before you cut it.  Well, I tried it both ways - hot, right out of the oven, and cooled overnight.


Both ways were so good.  I'm just not sure which way I liked better.  I guess I'll have to make it again.  And then I'll maybe be able to decide.

Go forth and conduct your own experiment using this bread.  You won't be sorry!

Cinnamon-Sugar Quick Bread
Adapted from A Whisk and a Prayer

1/3 cup canola oil
1 cup sugar
1 tsp salt
1 egg
1 cup milk
2 tsp vanilla extract
1 T baking powder
2 cups flour

Cinnamon/Sugar Mix:
2 tsp cinnamon
1/3 cup sugar

Whisk together the oil, sugar, salt, egg, vanilla and milk.  Add the baking powder and flour.  Stir until combined.  Pour a little more than half the batter into a greased loaf pan.

Combine the cinnamon and sugar.  Sprinkle most of the cinnamon/sugar on top of the batter in the pan.  Pour the remaining batter on top.  Sprinkle the remaining cinnamon/sugar mixture on top.  Use a knife to swirl it a little bit.

Bake in a 350 degree oven for about 50-55 minutes, until a knife inserted comes out clean.

Let the bread cool in the pan for about 30 minutes.  Carefully remove it, wrap it in foil and let it cool completely.  (Yeah, right!)  Or you can slice it and serve it hot.  It may fall apart a little, but it's fabulous still warm.  Enjoy!