As you already know, I was a guest blogger on Bethany's Book Blog earlier this week. Bethany has graciously agreed to share her family's Red Velvet Cake recipe with us! I have to admit that I was one of the decieved - I thought that cream cheese icing was the proper way to top a RVC. I am grateful to be properly informed now! This looks wonderful, Bethany! Thanks for sharing!
Well, this certainly is an honor! My name is Bethany, and I am so excited to be Elizabeth’s very first guest blogger. This is a historic moment for sure!

Pull up a chair, and let me tell you a little bit about myself….. Elizabeth and I met our freshman year in college; we lived in the same dorm and on the same hall. That was twelve years ago. I can’t believe that I’m old enough to even say something like that! Wow!!! I guess I’m getting older, but I still feel the same……. except wiser – I am definitely wiser than I was twelve years ago. Anyway, we were an instant match. Somehow our two opinionated personalities never clashed, and we’ve only grown closer through the years. We have kept in contact with many phone calls and several visits. This year will mark our second half-marathon that we will be running together. Isn’t that something? I’ll give you a minute to oooh and aaah. Ok, that’s enough. We only run so we can eat all this food we cook. Isn’t Elizabeth’s blog awesome? I’m loving it.
I am married to my wonderful husband of 6 years. Now I feel like I’m a contestant on a game show – they always refer to their spouse & children as wonderful. Fortunately for me, this is no game show, and my hunky honey truly is wonderful. This fall we will celebrate 6 years of wedded bliss. Fortunately, God saw fit to place us far South of that dreaded Mason-Dixon line. What a blessing! I can’t wait until Elizabeth is back in the gracious, wonderful South – the place where friendships are sweeter, and people know what seersucker is. I work full-time for an insurance agent, and in my spare time I’m voraciously reading to beat my hunky honey in our book reading competition. I’ve created a blog to keep up with our success, and to review all the books that I’ve read. Bethany’s Book Blog has been a lot of fun for me. I love followers, so please check me out and leave a comment! On to the recipe………..
Today I am going to divulge to you a secret family recipe (totally unlike those stupid Bush’s baked beans commercials). This is much sweeter, and we haven’t made any money off this recipe. Anyway, it is my Meemaw’s Red Velvet Cake recipe. Growing up, my mom made this cake for my birthday every single year. It was my very, very favorite growing up. Let me start by bringing you into the light. Traditional RVC is NOT – let me say that again N O T – frosted with cream cheese icing. That is very near blasphemy. Cream cheese icing, as delicious as it is, only belongs on fruit and vegetable cakes – like carrot cake & strawberry cake….. or cardboard because let’s face it, cream cheese icing is delicious! However, traditional RVC is made with RVC frosting. RVC frosting is a buttercream of sorts – although it’s not quite a true buttercream & can’t really be called buttercream frosting. If you insist on frosting your RVC cake with cream cheese icing, then don’t call it RVC…… you’ll just have to call it a fake, an imposter, a wanna-be. Now that you know this is a ditch in which I’m willing to die, let’s move on.
We are going to make a traditional cake recipe. There is one kind of funky think about this recipe. You will see that we will be mixing white vinegar and baking soda. It will fizz and you will pour it into your cake batter. This is an essential step that many recipes leave out. Additionally, we will be adding vanilla and almond flavoring – again many recipes leave out the almond flavoring. Don’t do that! It makes such a wonderful tasting cake.
First, go ahead & gather up all your ingredients. It’s great to have them handy so that you can get this delicious cake in the oven as soon as possible.
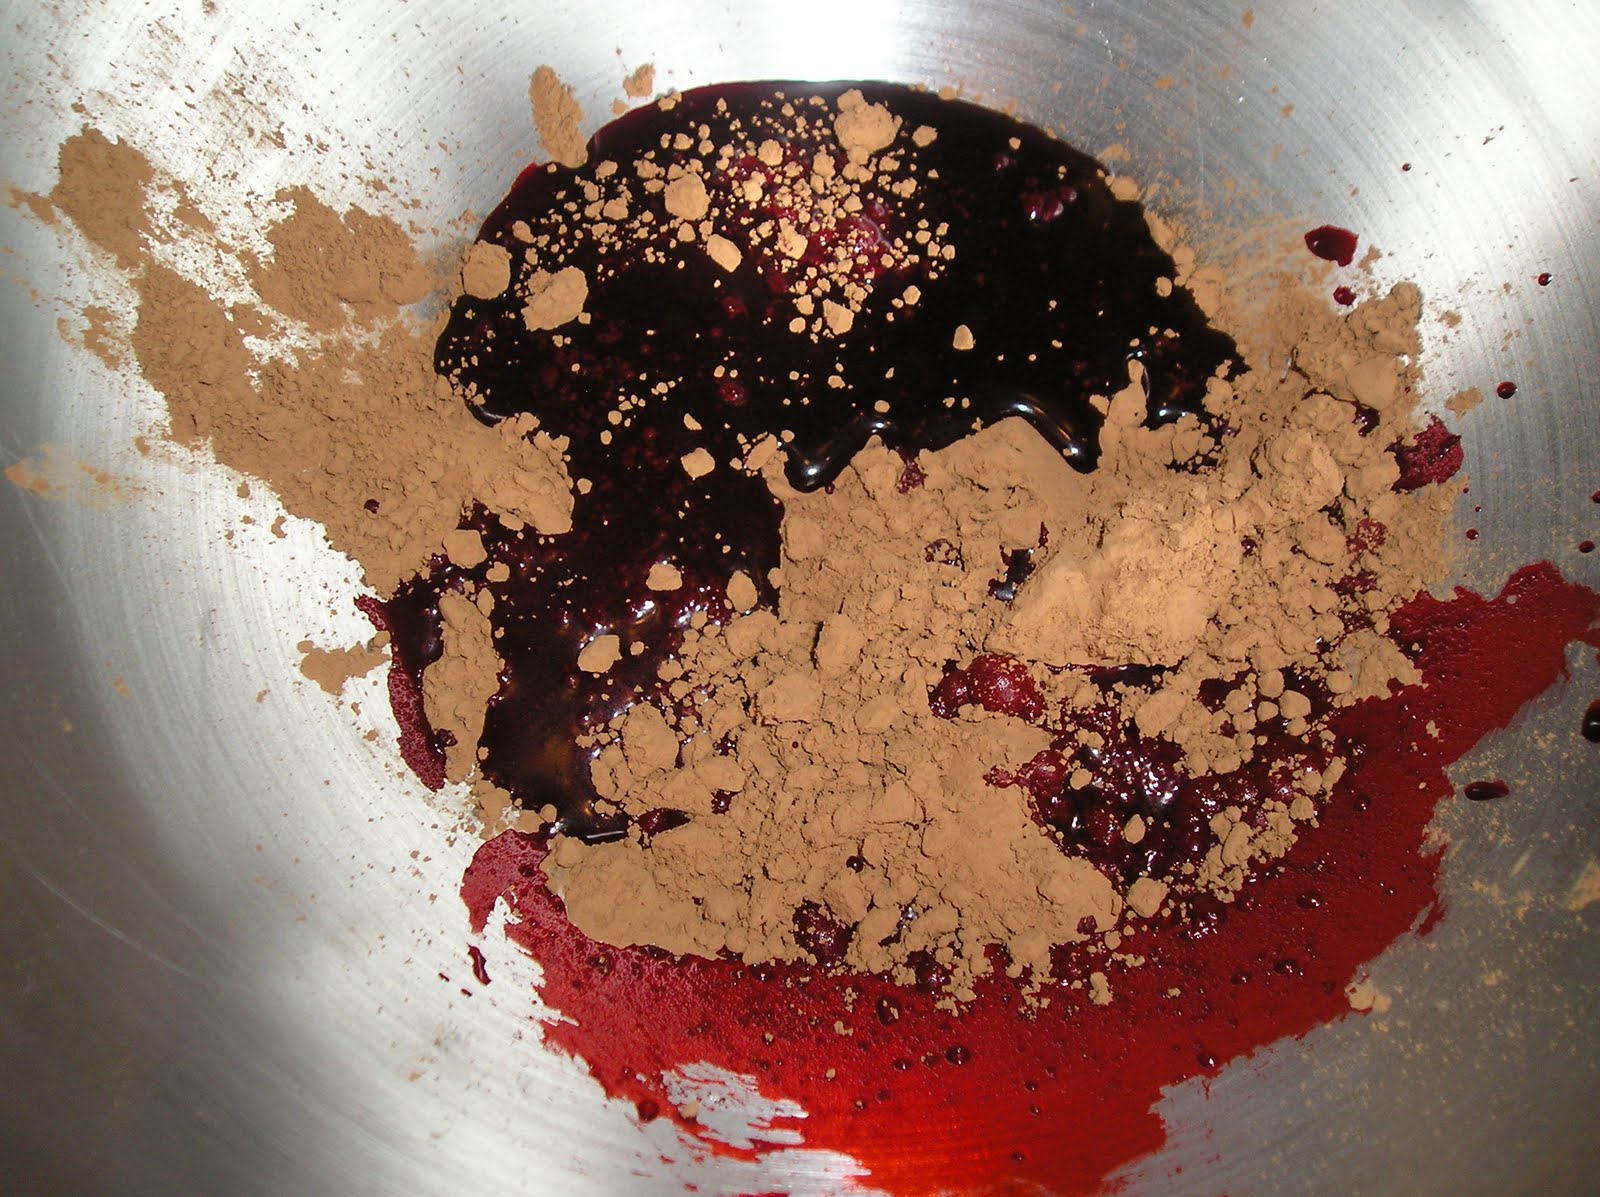
In the bowl of your mixer, begin by mixing together the cocoa and red food coloring. If you are using a standing mixer and your paddle attachment doesn’t do the job, then you may need to get in there with a wire whisk.
Next you are going to add your shortening, sugar and eggs. Mix well. Your mixture should look something like this. Are you beginning to get the reference to red velvet?
In a separate bowl, sift together the flour and salt. Now, I know that Elizabeth likes kosher salt for all things, but I do not like it for baking. I recommend regular Morton’s table salt…. but use whatever you prefer.
Now we are going to alternately add our sifted ingredients to the batter with buttermilk – beginning and ending with the dry ingredients. Your finished product will very much resemble a red velvety cake batter.
In a separate little bowl, combine your vanilla and almond flavorings. Pour into the batter. Do not mix yet.
In another little bowl, combine your vinegar and baking soda. I recommend pouring the vinegar first and then stirring in the baking soda. This will fizz on you. This is what you want to happen. Pour into the batter. Now you can mix everything together.
You are now ready to pour this red velvety goodness into your two prepared cake pans. To prep your pans, spray both pans with non-stick cooking spray. Now cut out two rounds of parchment paper to fit in the bottom of each pan and put them in the bottom (the cooking spray will help the parchment paper to stick). Now spray the pans again and sprinkle in some flour and slowly and gently tap the flour around the pan (sides included) until the pan is well coated with the flour. Tap out any excess flour. My prepared pans look like this….
Evenly divide the batter into the pans and bake until they are just done. Don't over-bake them, by all means. Once they come out, let them sit in the pan for about 2-3 minutes before removing them to wire racks to cool completely.
Are you ready to learn how to prepare RVC frosting? Here we go!
First we will make a flour paste. Cook your milk, flour, & salt in a saucepan over medium heat. You must stir constantly while this flour paste is forming. It won’t take very long.
Once your flour paste has formed, remove from heat completely. You MUST let this cool to room temperature completely. Cooling completely will probably take about 20-30 minutes. You want this to be room temperature when you add it to your butter and sugar mixture.
Next, beat your butter and sugar in a mixer fitted with the whisk attachment for 7 minutes.
I beat it on speed 6 of my Kitchenaid mixer. Gradually add the cooled flour paste. Not all at once. Tablespoon by tablespoon works well. Lastly, you will add your vanilla for one final mix. Your yummy RVC frosting will look like so. And this frosting is yummy! Try not to let your husband feed all of it to your kitties!
Now you are ready to frost your cake. Place one layer, rounded side down, on cake plate, spread about 1/2 cup of frosting to within 1/4 inch of the edge. Place second layer, rounded side up, on frosted layer. Frost second layer. Frost the sides by globbing the frosting on the top and use your spatula or knife to drop the frosting down the sides.
If you have a ridiculous cake decorating tool, then by all means do a ridiculous totally unprofessional little border like I’ve done. Oh, and then decide whether to give the empty bowl of frosting to your husband or your cats.
You can serve immediately or the next day. Your guests will love it! Please invite me over when you make this!
Now, please forgive the tacky blue “plate” on which this cake is served. This is the bottom to my cake carrier, & since I wasn’t serving this cake until the following day it was necessary to store it in my airtight cake carrier. I know it’s tacky, but at least I don’t have pink flamingos in my front yard!
Thank you for joining me. Let me know what you think. I’d love to hear from you!
Meemaw’s Red Velvet Cake
2 – 1 oz. bottles red food coloring
3 T cocoa
½ cup shortening
1 ½ cups sugar
2 eggs
2 ¼ cups flour
½ tsp. salt
1 cup buttermilk
1 tsp. vanilla extract
1 tsp. almond extract
1 tsp. baking soda
1 T white vinegar
Red Velvet Cake Frosting
1 cup milk
3 Tbsp. flour
pinch of salt
1 cup butter, at room temperature
1 cup sugar
1 tsp vanilla extract
For the cake, mix cocoa & coloring in the bowl of your stand mixer. Add shortening, sugar and eggs, mixing well with the paddle attachment.
Sift flour and salt together and add alternately to mix with buttermilk, beginning and ending with the flour mixture. Add vanilla and almond extracts to batter but do not mix. Stir soda into vinegar, add to batter and mix it all together.
Prepare two round cake pans - spray the bottoms with nonstick cooking spray, line only the bottoms of the pans with circles cut from parchment paper, spray the whole pan with nonstick cooking spray and then dust it with flour, tapping out any excessive flour. Pour batter evenly into cake pans. Bake 20-25 minutes at 350. Allow them to cool for 2-3 minutes in the pan before removing the cakes to wire racks. Cool completely.
For the icing, cook milk, flour and salt in a saucepan over medium heat. Stir constantly. Once thickened, remove from heat and let cool completely. Beat butter and sugar together for 7 minutes. Gradually add the flour paste, beat until fluffy. Stir in vanilla.
To frost the cake: place one layer, rounded side down, on cake plate, spread about 1/2 cup of frosting to within 1/4 inch of edge. Place second layer, rounded side up, on frosted layer. Frost second layer. Depending on how much frosting you have left, you can frost the sides too. The best way to do that is to kinda just glob the frosting up on the side of the cake. Then take your metal frosting spatula, and smooth the frosting out by turning the cake plate around as you move your spatula until the cake is covered.